Other Settings
Google Analytics
If you wish to track and report the traffic on your web-based TURBOARD interfaces, you can configure its Google Analytics tracking feature in this section.
How to enable traffic tracking for TURBOARD site in Google Analytics?
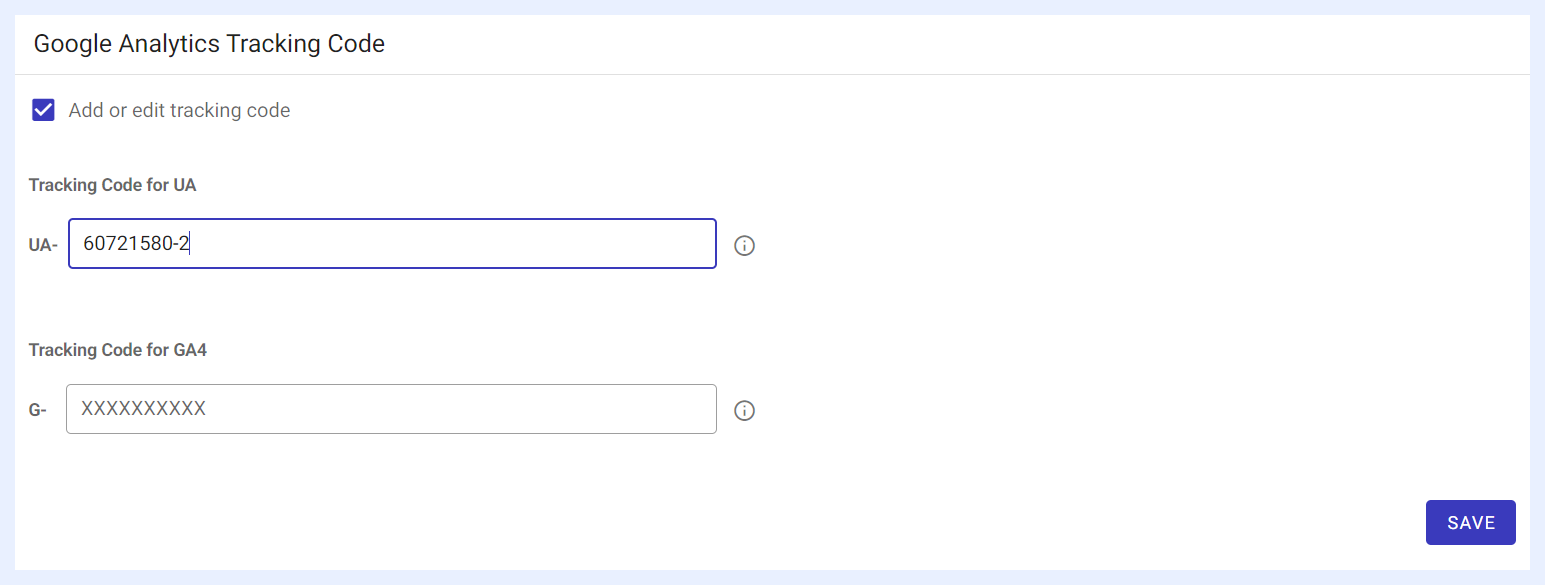
1 Go to Administration > Other Settings > Google Analytics.
2 Check “Add or edit tracking” code check box.
3 Copy the tracking code of your TURBOARD workspace portal in the related field – according to the type of your Google Analytics property:
-
Tracking Code for UA: in Google Analytics, it is called the “Tracking ID” and is in the format “UA-XXXXXXXX-0”. If you configured your TURBOARD workspace portal as a UA property in your Google Analytics Account, go to the Universal Analytics Property admin section and copy the code part after “UA-” in this field.
-
Tracking Code for GA4: in Google Analytics, it is called the “Measurement ID” and is in the format “G-XXXXXXXX”. If you configured your TURBOARD workspace portal as a GA4 property in your Google Analytics Account, go to the GA4 Property admin section and copy the code part after “G-” in this field.
4 Click SAVE button. The script with the tracking code will be automatically added to your TURBOARD website.
Important
In order to activate this feature, make sure that you have a Google Analytics account and your TURBOARD URL is configured in it as a UA or GA4 property.
Numeric Abbreviations
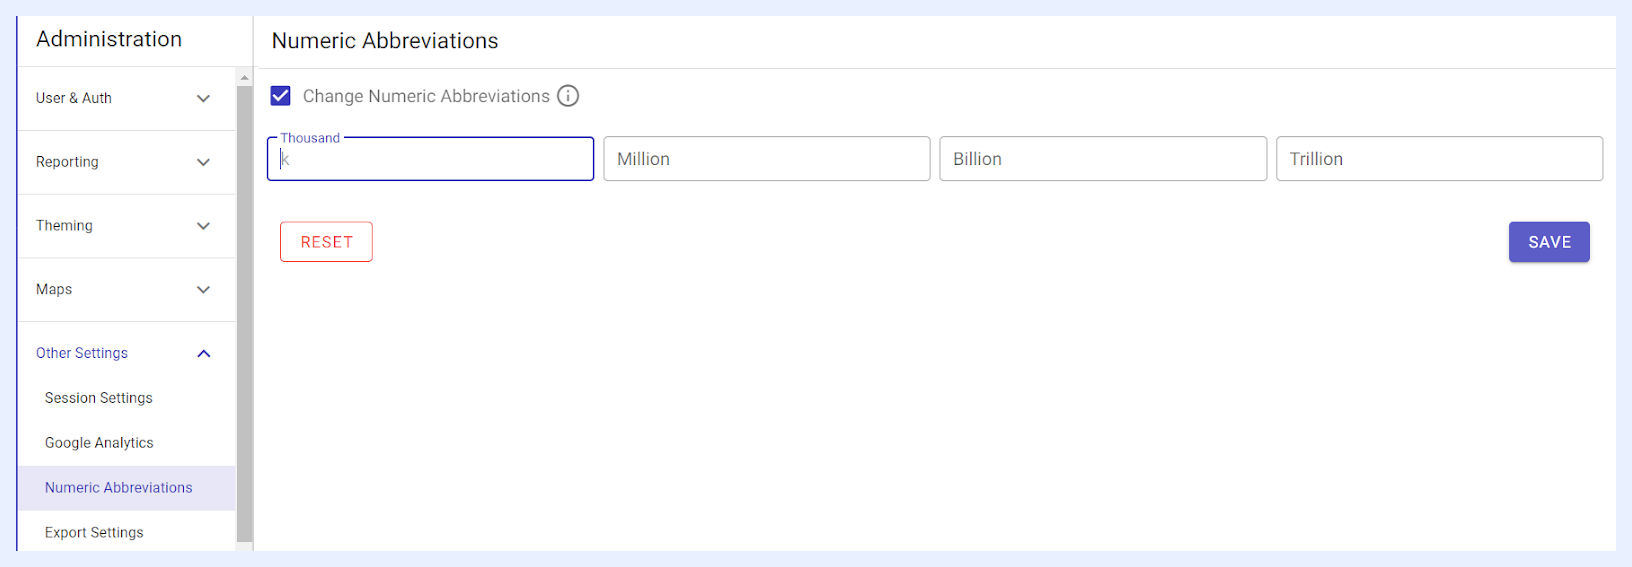
Abbreviations for numbers are pre-defined in TURBOARD interfaces according to the interface language. All numbers in thousands and bigger appear as abbreviations on all related dashlets in which “Thousands” are displayed as “k” for English (and “bin” for Turkish), “Millions” as “m” (and “milyon” for Turkish) and so on. However, the Admin users under this section can change or unify the numeric abbreviations for all interface languages.
1 Go to Administration > Other Settings > Numeric Abbreviations.
2 Check “Change Numeric Abbreviations” check box.
3 Type the abbreviations for numbers in the related fields.
4 Click SAVE button.
5 The abbreviations that you selected will be unified and will appear on all interface languages as set here.
Export Settings
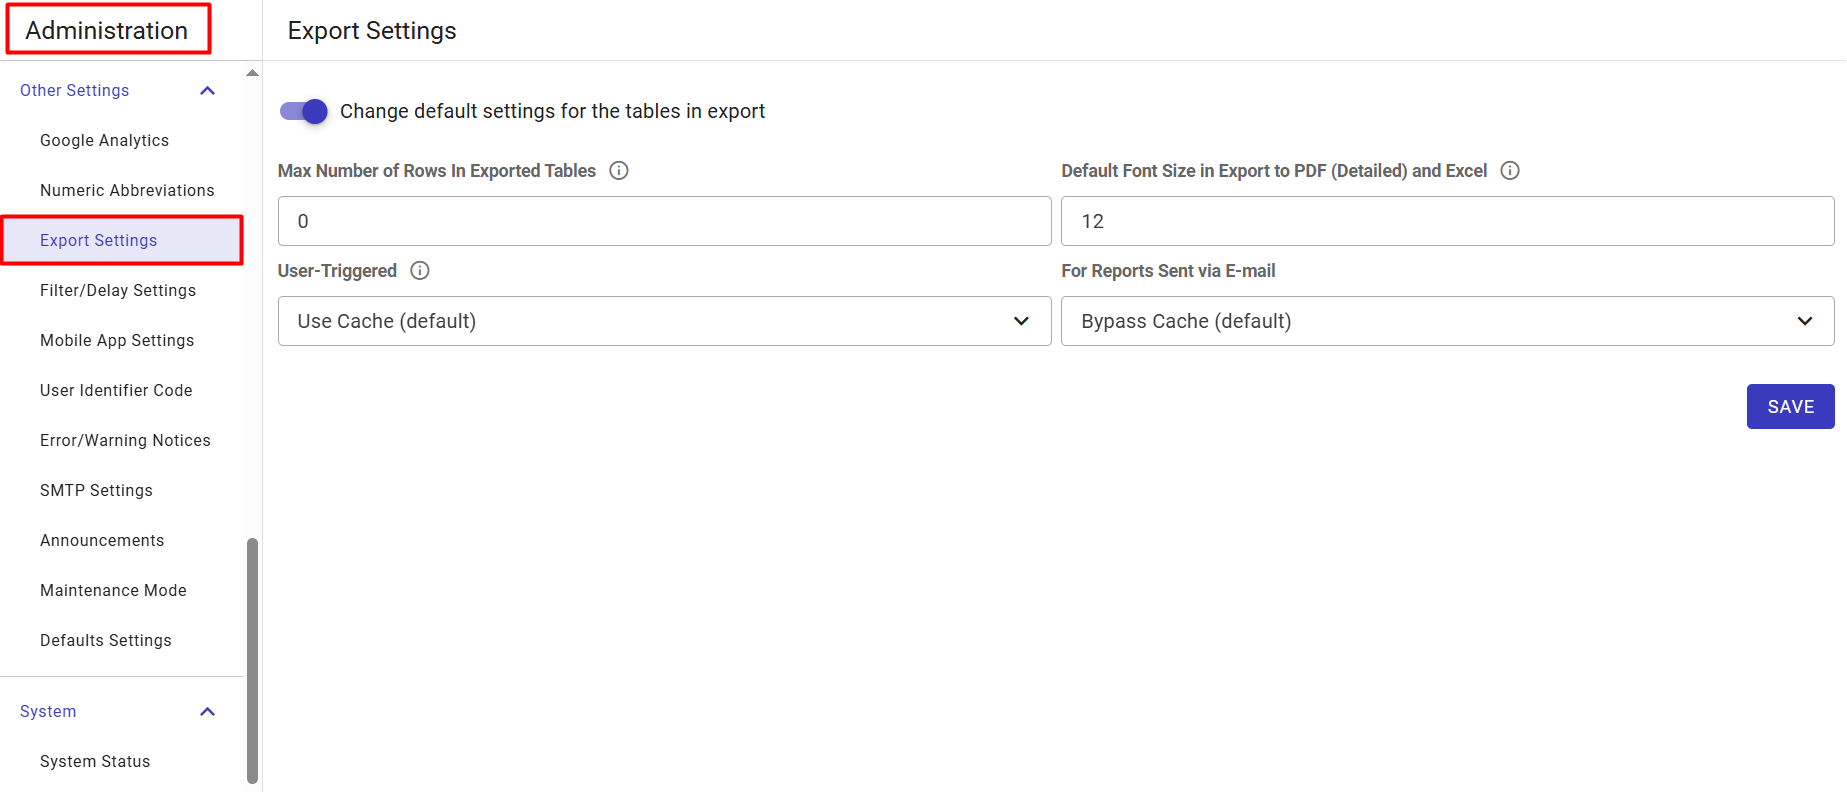
The Export Settings page allows administrators to define global, default parameters for data exported from TURBOARD. These configurations govern the visual styling, row limits, and data freshness (caching rules) applied when users download tabular data to Excel or Detailed PDF formats, as well as when automated reports are distributed via email.
Configuring Default Export Behaviors
1 Go to Administration > Other Settings > Export Settings.
2 Toggle the Change default settings for the tables in export switch to the ON position to reveal and activate the customization fields.
3 Configure the tabular export constraints and styling:
-
Max Number of Rows In Exported Tables: Define the absolute row limit for data exported to Excel and Detailed PDF formats. Enter
0to enforce no limit, allowing the full dataset to export regardless of size. -
Default Font Size in Export to PDF (Detailed) and Excel: Specify the base font size used to render the data rows and headers in the exported files (e.g.,
12).
4 Determine the caching behavior for data retrieval during exports:
-
User-Triggered: Controls ad-hoc manual downloads initiated by users. Select
Use Cache (default)to significantly speed up file generation by utilizing recently saved data, or chooseBypass Cacheto force the system to query the live database for the most current data (which may increase download times). -
For Reports Sent via E-mail: Controls the data freshness for automated, scheduled report deliveries.
Bypass Cache (default)is recommended here to ensure recipients always receive the latest, real-time data snapshot in their inbox.
5 Click the SAVE button at the bottom right to apply the new export policies globally.
Filter/Delay Settings
From this section, the Admin user can determine the general settings for the filters that are added to new dashboards.
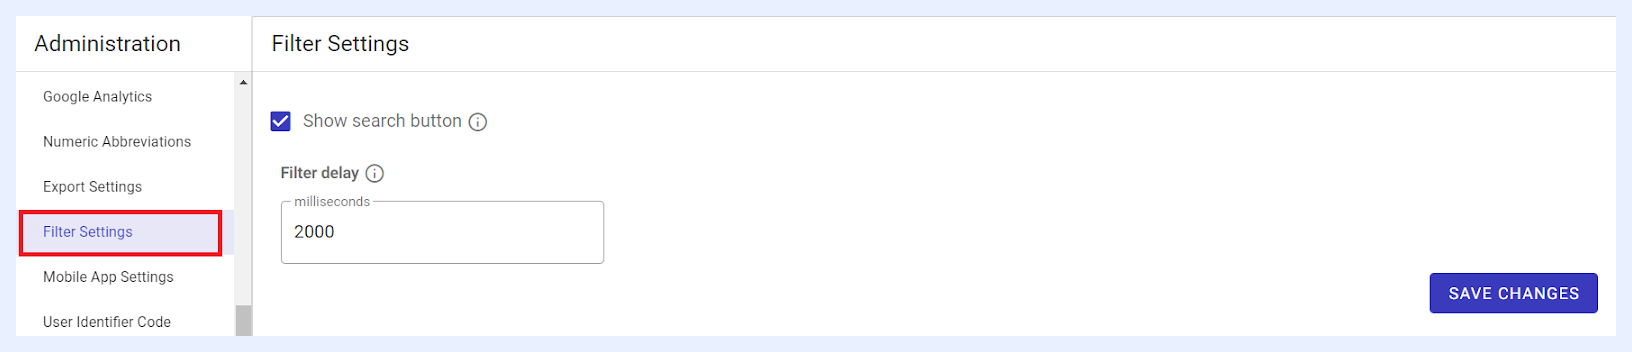
1 “Show search button” check box:
-
If checked: the
SEARCHbutton for the filters that are added to any new dashboard will be displayed on that dashboard. In this case, dashboard users shall manually click the button in order for the dashboard to apply the filters and fetch the results accordingly. -
If unchecked: the
SEARCHbutton for the filters that are added to any new dashboard will be hidden and the filtering will be automatically triggered when the dashboard user selects a new filter action. The delay time before the filter is automatically triggered will be according to the set time in “Filter delay” field.
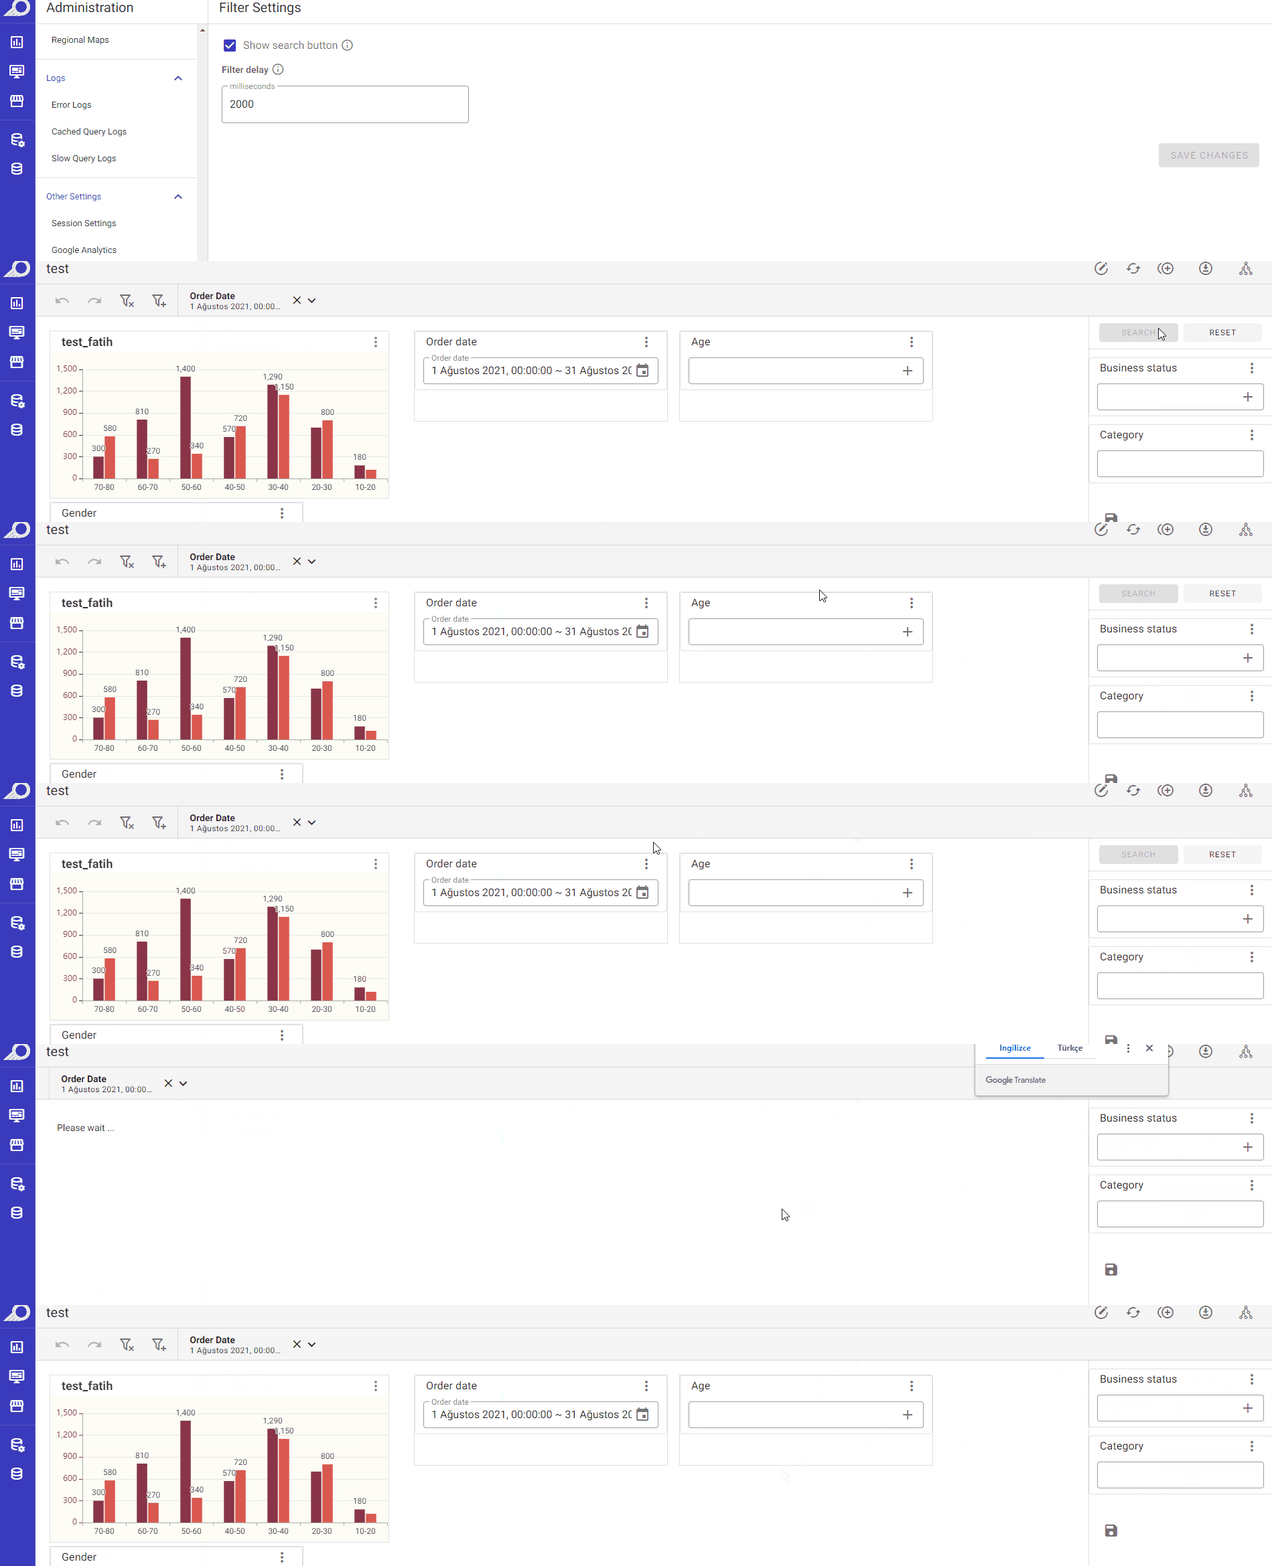
2 “Filter delay” field: if the SEARCHbutton is hidden in the dashboards (“Show search button” check box is unchecked), the admin user can determine the time period (in milliseconds) during which the system will wait for the user to finish making changes to the filters before automatically triggering the search function.
Note
The modifications/changes made to the visibility of the SEARCH button for filters in this section will only impact newly created dashboards. The filter settings of previously created dashboards will remain unchanged and assume the same settings as before the modifications were implemented.
Mobile App Settings
The Mobile App Settings page allows administrators to configure the default behavior and routing for the TURBOARD mobile application. This includes determining the initial landing experience for mobile users and customizing the deep linking paths used when users click TURBOARD links from their mobile email clients.
Configuring Mobile Landing and Deep Links
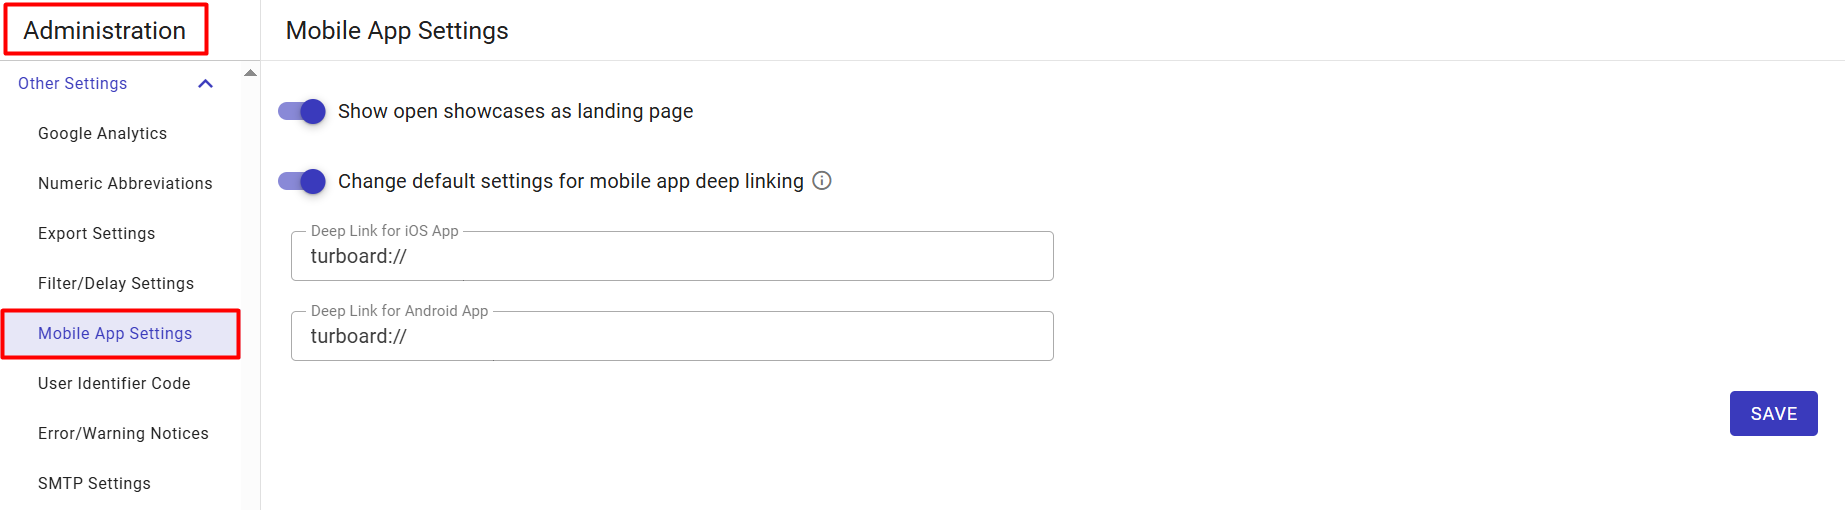
1 Go to Administration > Other Settings > Mobile App Settings.
2 Show open showcases as landing page: Toggle this switch to the ON position to automatically display open showcases as the primary landing interface when users launch the mobile app.
3 Change default settings for mobile app deep linking: Toggle this switch to the ON position to override the default mobile routing URIs.
Custom Deep Linking
If you configured the logo link in TURBOARD emails to redirect mobile users to the app (via the Logo and Header admin page), clicking that link on a mobile device opens the default TURBOARD app (turboard://). If your organization uses a custom, white-labeled TURBOARD mobile app or requires routing to a different URI, use this setting to override the defaults.
4 If deep linking is enabled, define the custom URI schemes in the exposed fields:
-
Deep Link for iOS App: Enter the custom URI scheme for Apple devices (default is
turboard://). -
Deep Link for Android App: Enter the custom URI scheme for Android devices (default is
turboard://).
5 Click the SAVE button on the right to apply the mobile configurations.
User Identifier Code
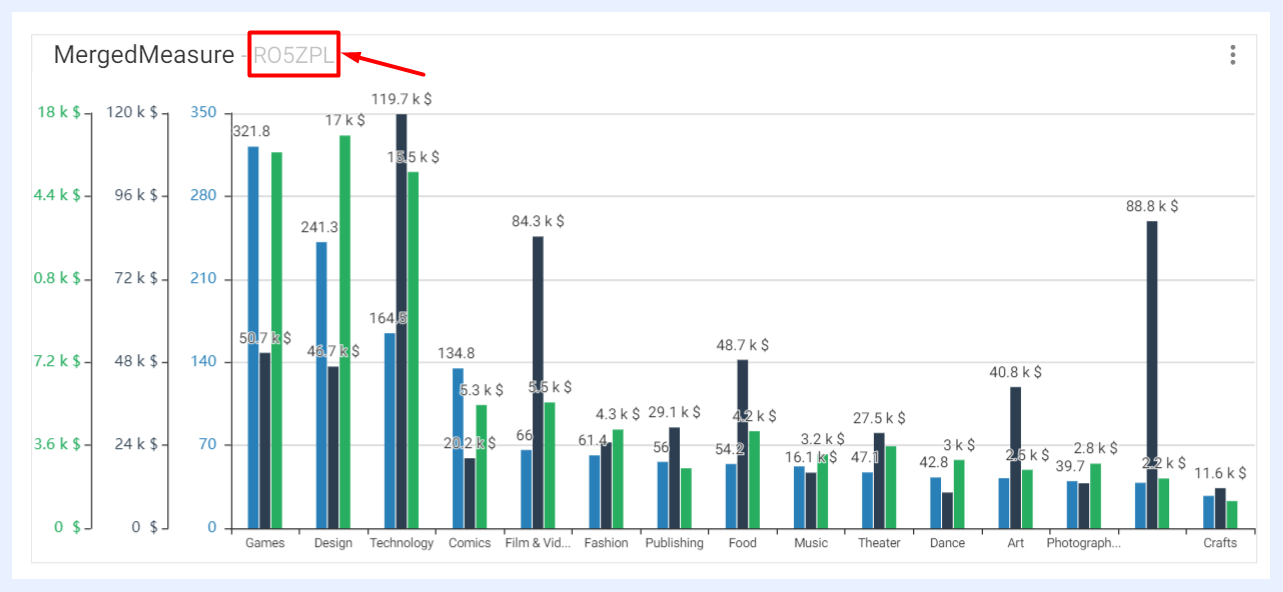
A unique identifier code is automatically assigned for each TURBOARD user in “View” mode of dashboards and showcases. This code is for the user who is viewing the dashboard and/or showcase and can optionally appear at the end of the dashlet title if set by the admin user from this section.
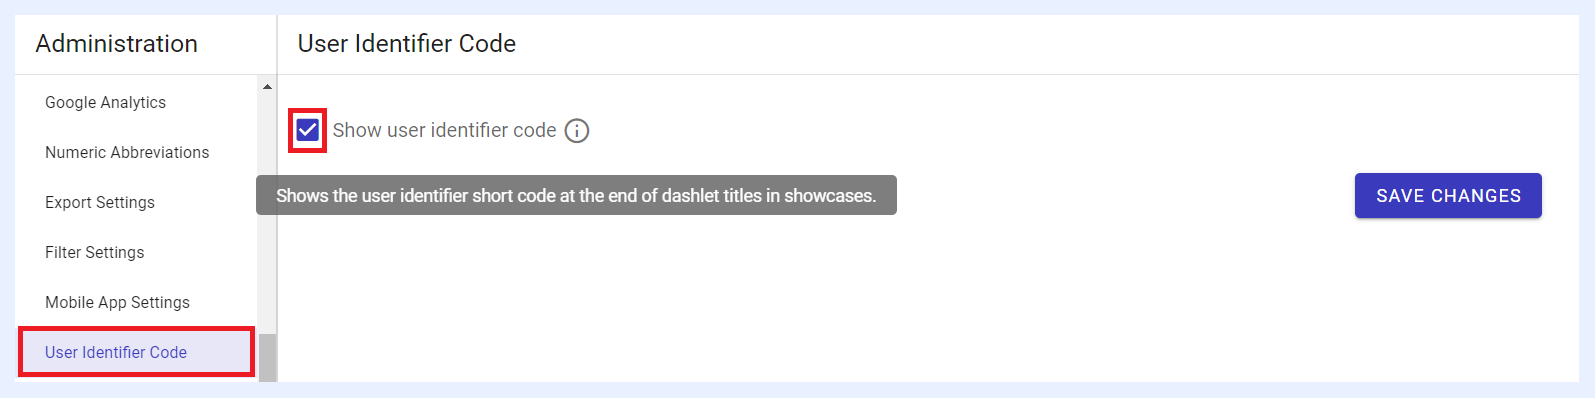
1 Go to Administration > Other Settings > User Identifier Code.
2 “Show user identifier code” check box: when checked, the user identifier code will appear on all dashboards and showcases for all users.
3 Click SAVE CHANGES button.
Displaying the user identifier code in viewed dashboards and showcases helps tracking user activities. For example, if a user takes a screenshot of the relevant dashlet and sends it to another place, it can be possible to know which user sent it from the code on the dashlet. If such cases occur and tracking such activities might be required, you may contact TURBOARD’s support team at support@turboard.com for help in this regard.
Error/Warning Notices
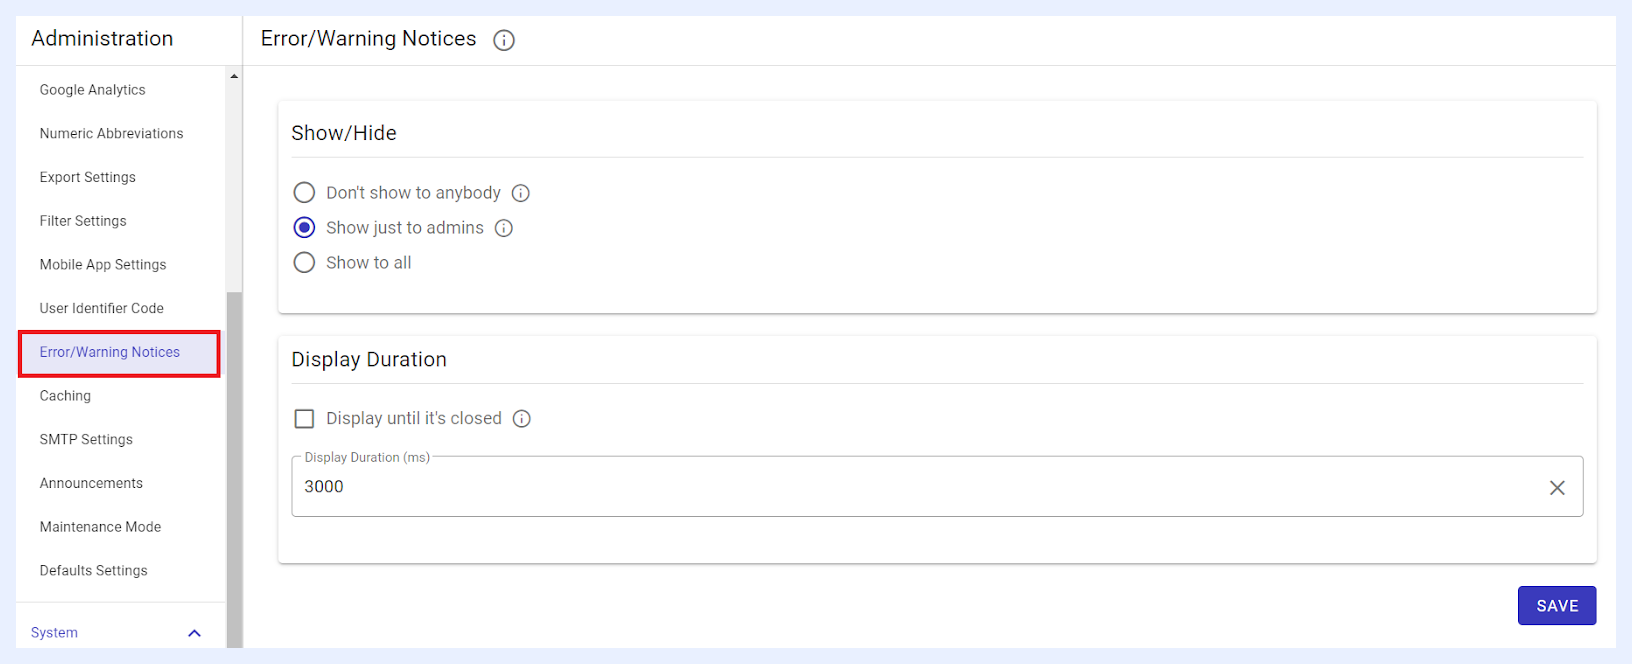
From this section, the Admin User can control showing/hiding from users the warning and/or error notices/ notification messages that will appear on their TURBOARD screens and how they will be displayed as below:
1 Who can see Error/Warning Notices:
-
“Don’t show to anybody” radio button: if selected, all Error/Warning Notices will not be displayed to any user.
-
“Show just to admin” radio button: if selected, Error/Warning Notifications will be displayed to all Admin and Designer users and only Viewer users will not see those notice messages on their TURBOARD screens.
-
“Show to all” radio button: if selected, Error/Warning Notices will be displayed to all user types.
2 Display Duration of Error/Warning Notices:
-
“Display until it’s close” check box: if checked, Error/Warning Notices that will appear to users will not be closed automatically but only when the user closes them by clicking
xwindow icon. -
Display Duration (ms) field: if the "Display until it's close" check box is unchecked, this field will be enabled. You can specify in milliseconds how long the notices should be displayed before the system closes their pop-up windows.
Note
The settings above will affect the errors and warnings related to developer-handled errors such as syntax, logic, run-time and semantic errors. Errors that are not handled by developers (such as server errors and security warnings) will be displayed regardless of the settings in the "Error/Warning Notices" section.
SMTP Settings
SMTP (Simple Mail Transfer Protocol) settings refer to the protocol and server details that are used by email clients or servers to send emails. These settings are usually set up in email clients (a computer program or application that is used to access and manage a user's email) like Outlook, Gmail, Yahoo Mail, etc., or email servers. They contain the essential information required to send and receive emails, such as the SMTP server name, port number, authentication method, and password.
In TURBOARD, the ability to send notifications and alerts to its users via email is a key feature. Therefore, it is important to ensure that the settings for this feature are configured correctly to guarantee that emails are successfully sent and received. In other words, the emails sent from TURBOARD to its users will be sent through the email client of the TURBOARD environment owner that is configured in this window.
Configuring SMTP Settings in TURBOARD
How to configure SMTP settings?
1 Go to Administration > System > SMTP Settings.
2 Fill in the SMTP details and settings in the related fields:
-
“Server Host” field: provide the server host name of the SMTP server that will be used when sending emails.
-
“Port” field: provide the port number used to access the SMTP server.
-
“SMTP User and Password” fields: enter the user mail and password used to authenticate the SMTP server.
-
“Sender Mail Address” field: enter the email address that will appear in the “From/Sender” section of the email when any email is sent from TURBOARD. You may leave it empty if you want the default email address to appear.
-
“Mail Footer” field: this option allows you to customize the content that you want to appear as the email signature (HTML code tags can be used to manipulate the design – if needed). It will be automatically added to the end of the sent emails and will replace the default text. If left blank, the default pre-configured text will appear at the bottom of the sent emails. See the images below.
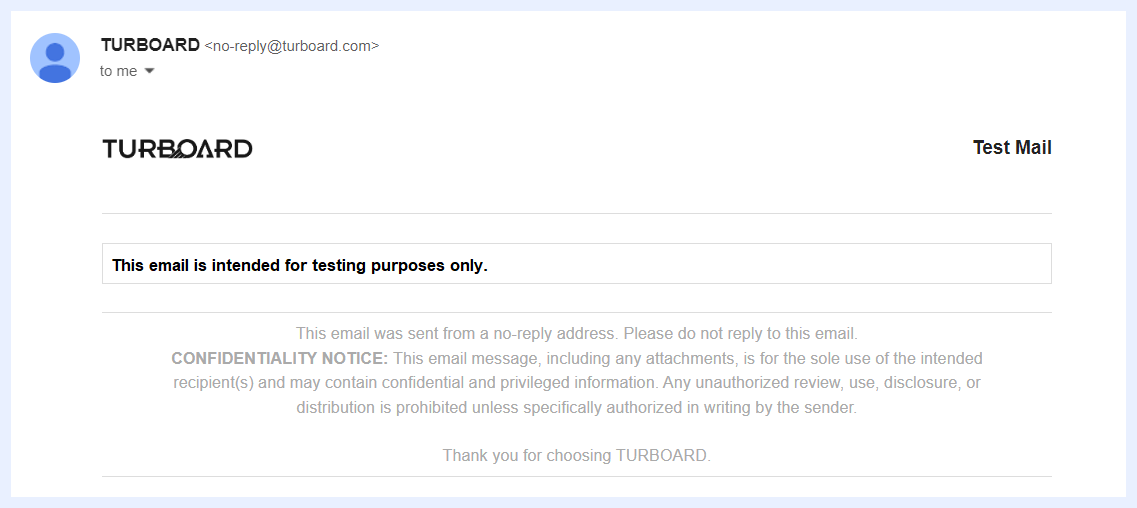
A test email sample with a customized footer
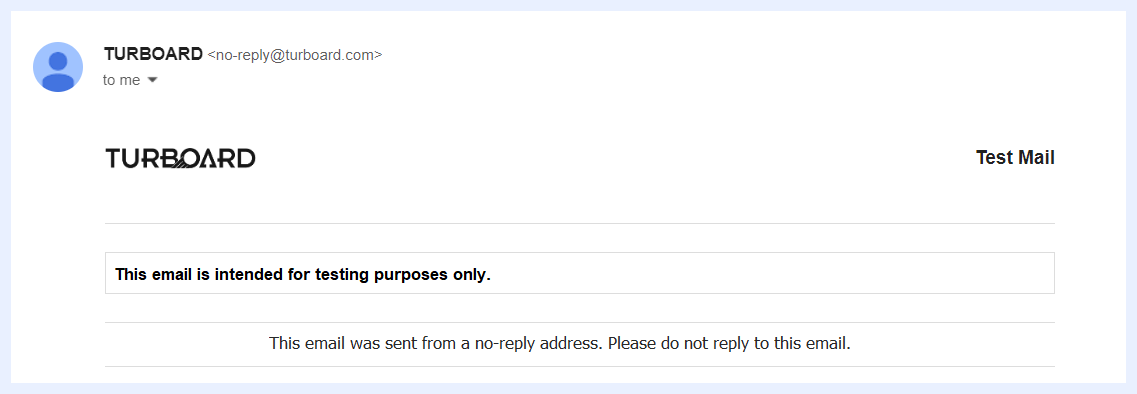
A test email sample with default footer
3 Select the connection security type from the radio buttons as below:
-
Secured connection using TLS: if selected, the sent email will be intercepted using TLS (Transport Layer Security) cryptographic protocol during transmission to protect the confidentiality and integrity of the email content.
-
Secured connection using SSL: if selected, the sent email will be intercepted using SSL (Secure Sockets Layer) cryptographic protocol during transmission to protect the confidentiality and integrity of the email content.
-
Unsecured connection: it is recommended that you send your email over a secure connection – either a TLS or an SSL as above. However, you may choose this option but the information in the sent emails will not be encrypted during transmission and its privacy therefore is not guaranteed.
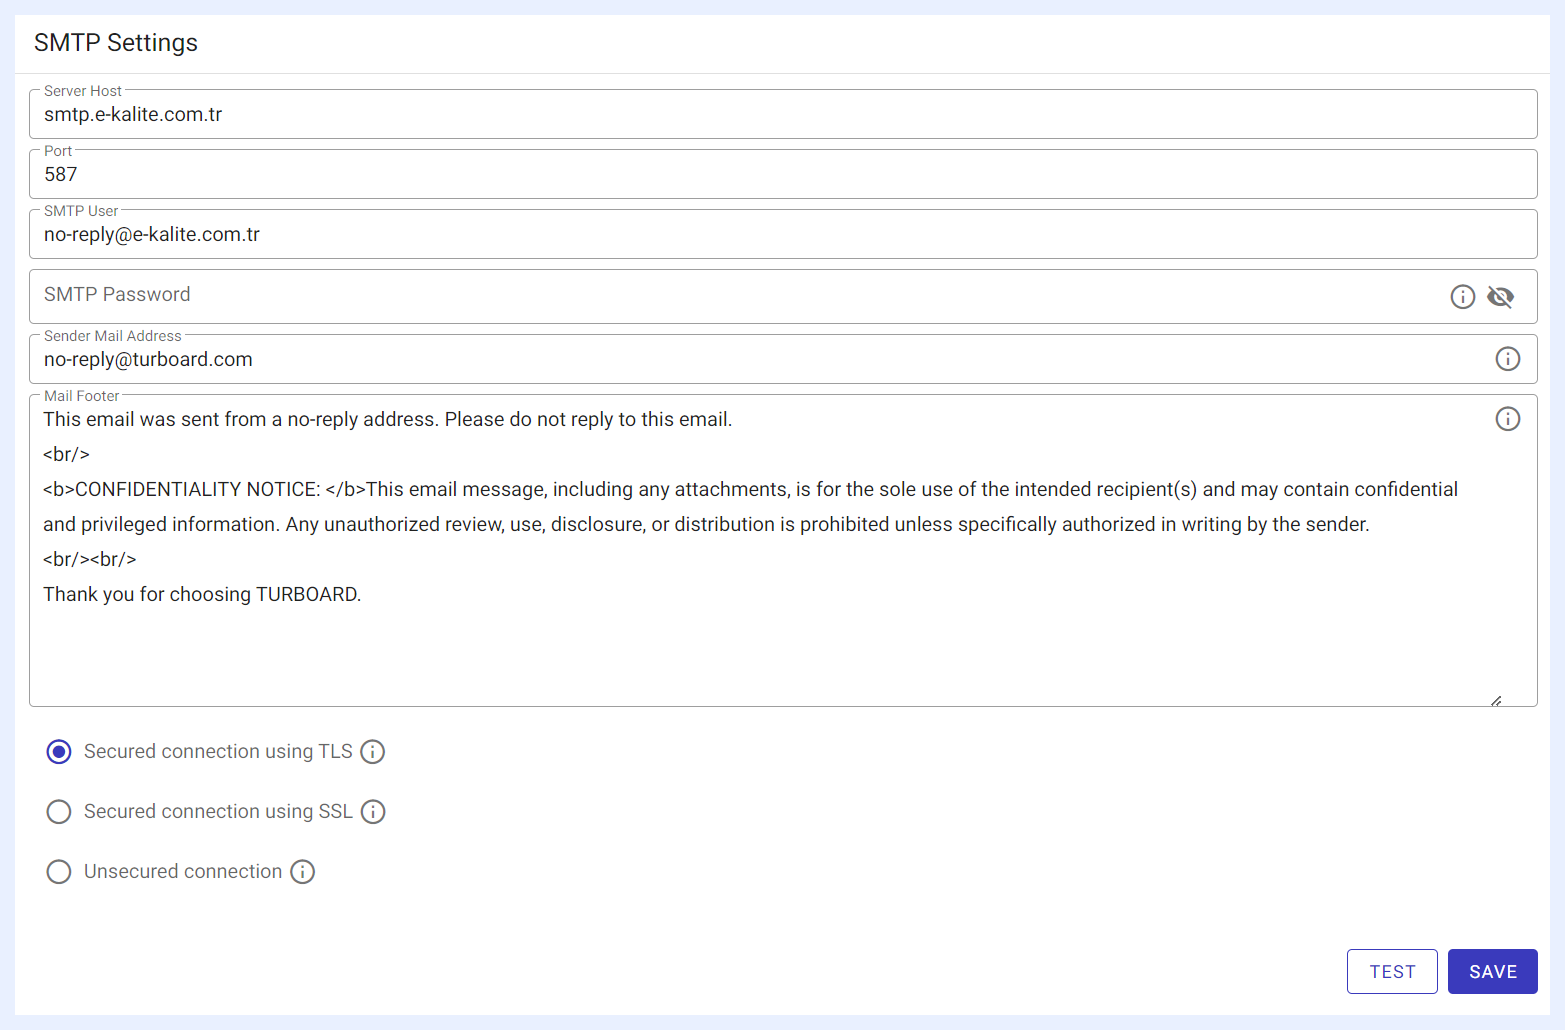
4 TEST button: when clicked, an overlay window will open in which you shall provide an email address in order to test the configurations above. Click SEND button once the receiver email address is entered.
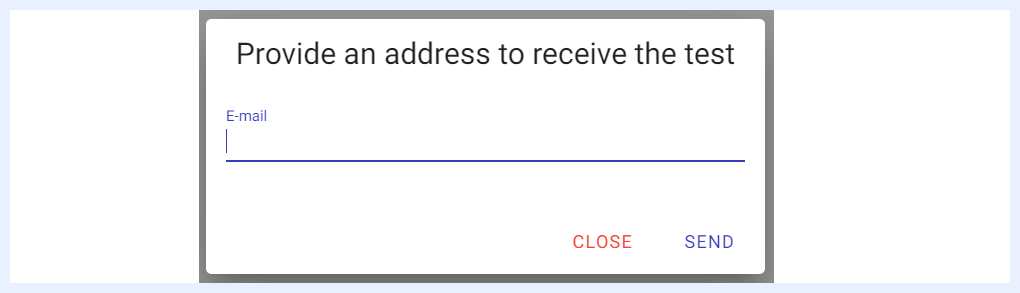
5 If the settings are all correct and the connection to the SMTP server is successful, a successful message will appear and the provided email address will receive a test email message automatically showing the sender email details as set above. Once done, click SAVE button.
Announcements
Under this section, Admin users can optionally set an announcement to appear to all TURBOARD users upon login. The announcement will appear as an overlay window in the login page, in which users can view/read it before logging in.
How to set an announcement for TURBOARD users?
1 Go to Administration > System > Announcements.
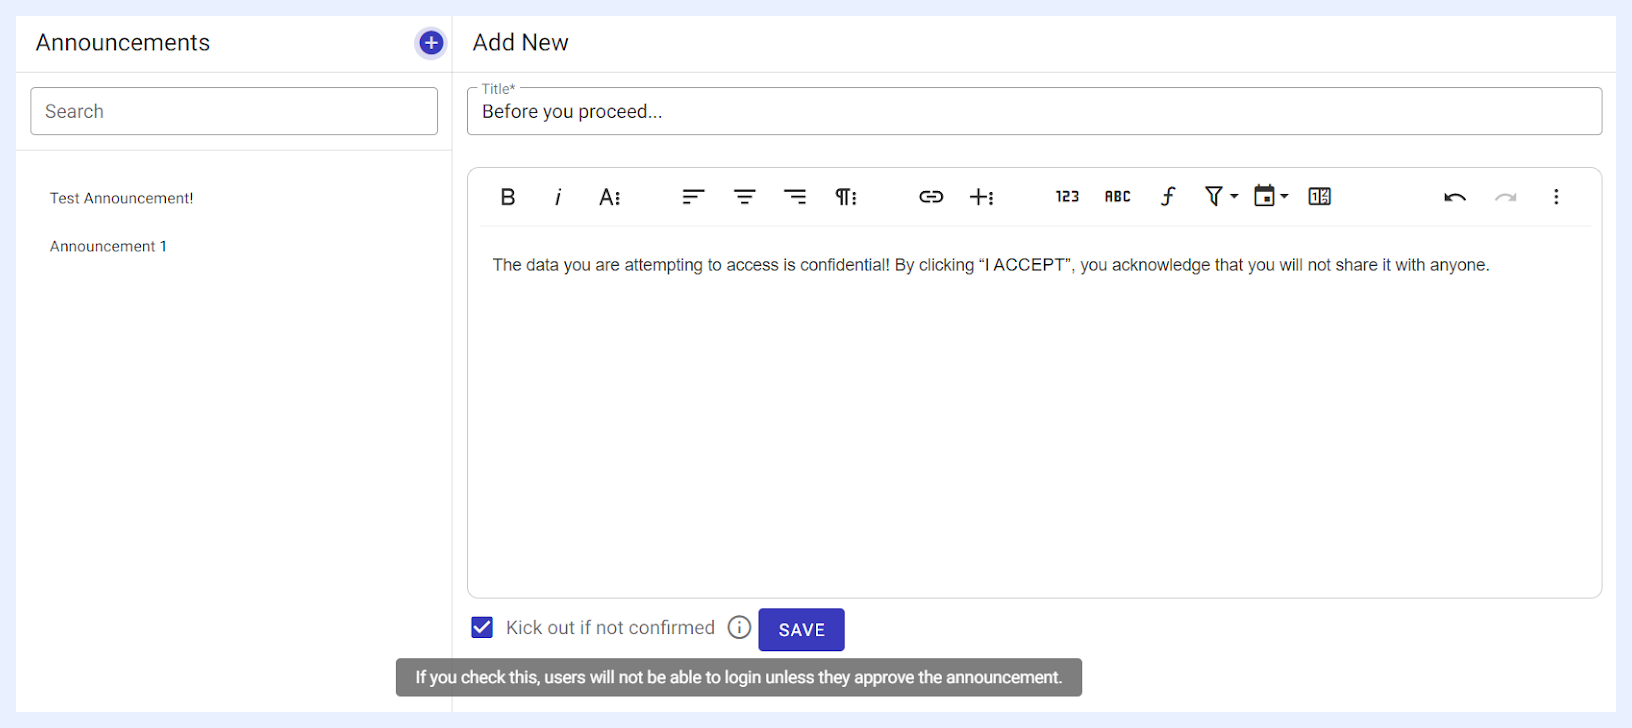
2 Click + Add a new announcementicon, and fill the fields in the “Add” window that opens:
-
“Title” field: the text you fill in this field will appear as the main title at the top of the announcement’s overlay window.
-
Announcement body text: use the HTML editor to write the content of your announcement.
-
“Kick out if not confirmed” check box: if checked, users cannot login to TURBOARD without clicking
ACCEPTbutton to go back to the login page. If unchecked, the user can either clickOKbutton orCANCELbutton and proceed to login.
3 Click SAVE button.
4 Once your announcement is prepared and successfully saved, select it from “Announcements” left-menu and click ACTIVATE button in the “Edit” window that opens.
5 The announcement set above will appear automatically to TURBOARD users when they attempt to login to the platform as an overlay window.
6 From the selected announcement “Edit” window, you can:
-
DEACTIVATEthe active announcement so it no longer appears on the login page, or -
REMOVEany added/saved announcement, or -
ACTIVATEanother announcement to replace the current active one.
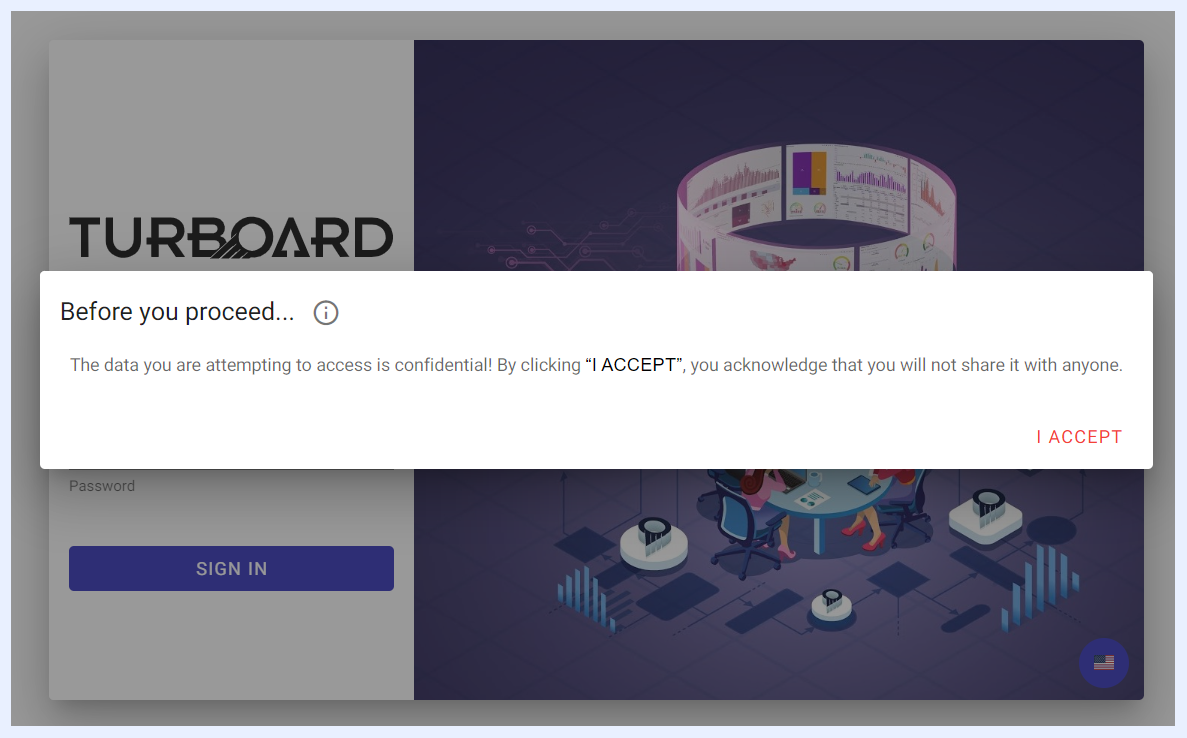
A sample of an announcement activated on TURBOARD Login page
Note
You may prepare and save as many announcements as desired, however, you can only activate one at the time to appear at the login page. The active announcement will be assigned a dark circle icon to indicate that it is active.

Maintenance Mode
In certain cases, a TURBOARD admin may need to prevent all users from temporarily logging into TURBOARD for reasons such as having critical or confidential data on the connected databases that shall be hidden from all users until decided otherwise.
From this section, the Admin user can deactivate all users’ access to TURBOARD and replace the login main screen with a special message indicating for example that the system is under maintenance or being not available for the time being.
Customizing & Activating Maintenance Mode
How to customize and activate maintenance mode feature?
1 Go to Administration > System > Maintenance Mode.
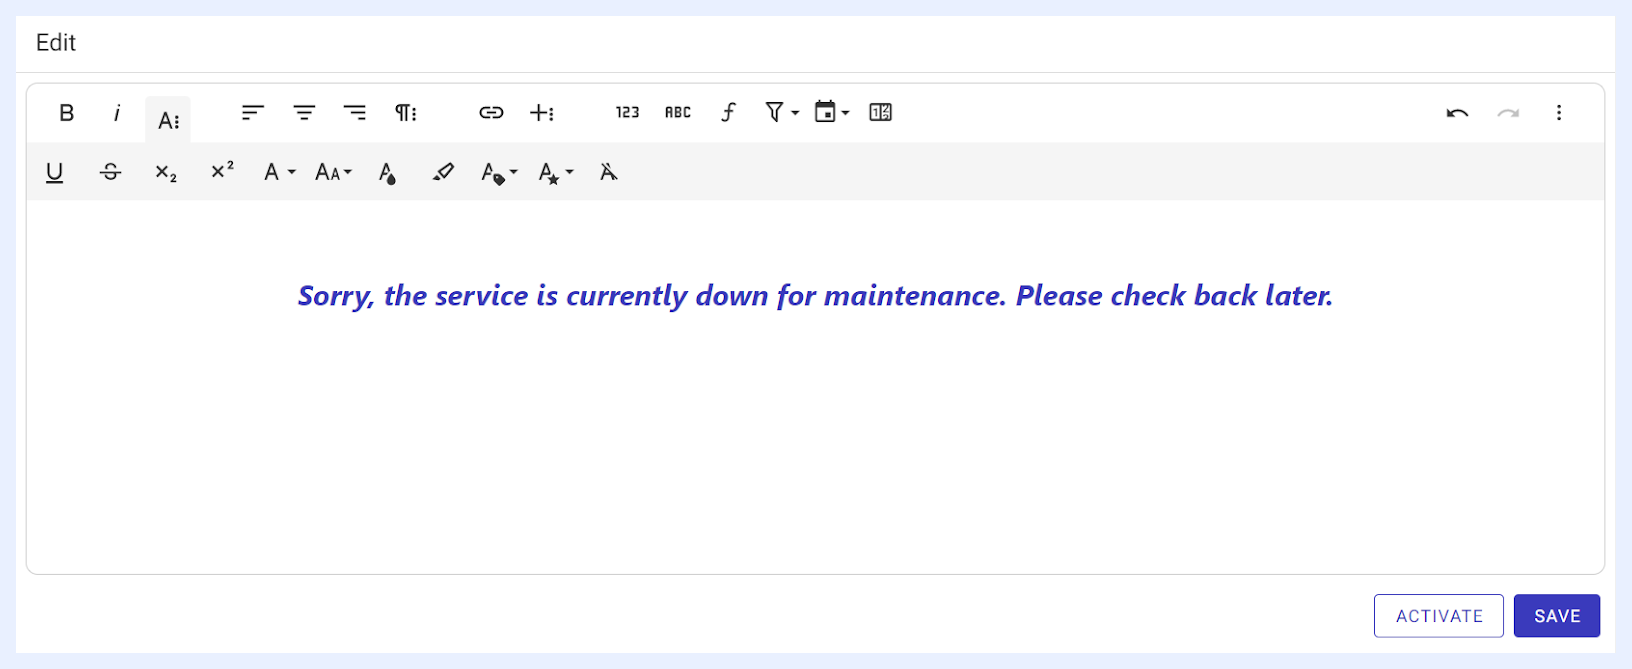
2 Type the content of the message that you want to appear to all users in the “HTML Editor” section in the edit window that opens. You may customize the content and its design as requested using the HTML editors’ available formatting and styling icons.
3 Click SAVE button to save the content that you have prepared. Note that this will not activate the maintenance mode but only saves your message.
4 Click ACTIVATE button to activate the maintenance mode and prevent all users from logging into TURBOARD. Upon clicking the button, the content will appear to any user attempting to login.
Important
If you choose to activate the maintenance mode, this means that all users, including you as a Super Admin user, won’t be able to access TURBOARD again. Therefore, you shall work with this option with caution.
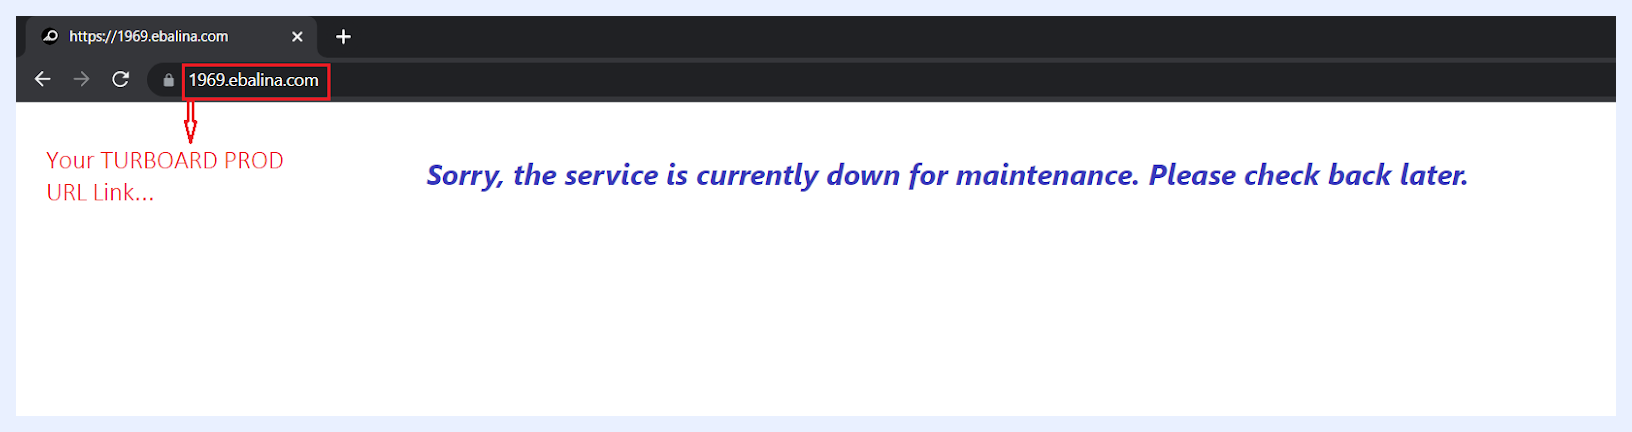
Sample of a Maintenance Mode page as will appear to End-users
Deactivating Maintenance Mode
How to deactivate maintenance mode and make TURBOARD available to access again?
1 When the maintenance mode is activated, this means that all users, including Super Admin users, won’t be able to login to TURBOARD again. Therefore, a Super Admin user can deactivate it and make TURBOARD available to access through a Django site admin page of your TURBOARD environment.
2 TURBOARD Support department will send to the Super Admin a URL link of TURBOARD’s Django site admin page in which he/she can login to it using the same credentials for his/her TURBOARD user account.
3 Once successfully logged in, the Admin user can select “Hide” radio button for “Maintenance Mode” section in “Settings” page.
Important
If you choose to activate the maintenance mode, make sure to contact support@turboard.com in order to obtain access link to Django Site Administration page.
Defaults Settings
This section empowers the Admin user to customize the default settings for TURBOARD’s visualizations, including dashlets, dashboards, and showcases. These settings determine the initial appearance and behavior of new visualizations created by authorized users.
When a new visualization is created in TURBOARD, it inherits pre-set default settings. However, these can be tailored by the Admin user to better align with organizational preferences through this window. For instance, when a new pivot table dashlet is created, it defaults to Auto-preview with standard TURBOARD styling and design. Through the Defaults Settings, the Admin user can modify these aspects, such as changing the default styling or enabling auto-refresh, which is not active in the original default settings.
Benefits of Customizing Defaults
This feature streamlines the visualization creation process, ensuring that new items automatically conform to an organization’s preferred style and functionality. For example, every new pivot table created in TURBOARD will adopt the Admin-defined settings, enhancing consistency across the platform. While these presets offer a standardized starting point, Designer users retain the flexibility to adjust settings on individual visualizations as needed.
How to Change Defaults Settings?
1 Navigate to Administration > Other Settings > Defaults Settings.
2 From the drop-down list(s), select the visualization type you wish to customize.
3 Click on the VIEW DEFAULT button. This action will open the edit window, displaying the default Settings and Configurations Panel for the selected visualization.
4 Within this panel, you can modify the settings as desired. These changes will automatically be saved and set as the new defaults for the respective visualization type.
5 Should there be a need to revert to the original default settings, the Admin user can easily do so. Simply return to the Defaults Settings page and click the RESET SELECTED button. This will restore the original default settings for the selected visualization type.

Changing the Defaults for a Dashlet / Pivot Table
Which Default Settings Can Be Changed?
The Defaults Settings screen allows the Admin user to customize various aspects of TURBOARD’s visualizations. The range of customizable default settings varies based on the type of visualization. Upon selecting a visualization type and clicking the VIEW DEFAULT button, the following options are available for customization:
-
Chart Dashlets: Settings and Styling configurations.
-
Pivot Table Dashlets: Settings and Styling configurations.
-
Info Cell Dashlets: Settings and Styling configurations.
-
Regional Dashlets: Settings and Styling configurations.
-
Geographical Dashlets: Settings configurations.
-
Dashboards: Settings, Styling and Filters configurations.
-
Showcases: Settings configurations.
Note
Modifications in the Defaults Settings only affect visualizations created post-change. Existing visualizations will maintain their original settings or as manually adjusted by their designers. This ensures that ongoing work remains unaffected while new creations benefit from the updated standards.