Creating Dashboards
Dashboards General Features
A “Dashboard” is a collection of dashlets. It is a container consisting of multiple dashlets that provides you with a centralized view of information and insights in real-time or for recently updated data and allows for quick filtering and querying of the data. It is basically the end-user interface where the selected dashlets are gathered together to tell a story.
Dashboards are customizable, which makes data interpretation easy, increases efficiency, and enables collaboration.
Designer users can choose from a variety of different layouts to create their dashboard.
Dashboard formatting can be customized, and elements such as HTMLets, images, figures, and other visual and informative components can be added.
Filters and merged filters can be added, and their location on the dashboard can be determined.
Designers can determine what end-users can view on the dashboard, as well as what actions they can perform. This includes the ability to export the dashboard into external files, the type of files that can be used, and the action icons that can be seen and clicked on for the dashlets that are added to the dashboard and on the dashboard level as well.
How to Create a Dashboard?
1 From the “Navigation Sidebar Menu” > Go to Dashboards > click + Create New Dashboard.
2 An overlay window will open. Give a name to your dashboard in “Title” field.
3 If needed, enter a “Description” for the dashboard and/or a “Tag” in the relevant fields. Tags are useful for organizing and searching for content, as they allow you to quickly filter and find items that have been labeled with the same tag. When you label dashboards with specific keywords or terms, it will help find them grouped upon “Search” in their view listing main page.
4 Click CREATE button. Your dashboard will be created and opened with its playground so you can configure its settings.
5 Start by adding the dashlets that you want to your dashboard by clicking Show Dashlet List button > Clicking on the required dashlet > the dashlet/s will be added automatically upon click. If there are numerous dashlets listed, you can utilize the search function to find the specific ones you need.
6 The design (location and size of the added dashlets) can be manipulated by moving each dashlet or resizing it with the mouse.
7 Other options are available to add components (other than dashlets) to the dashboard, and to change the default settings of the dashboard. Those options are demonstrated in “Managing Dashboards” section.
Note
All the dashlets that will be added and gathered in the new dashboard must be prepared/created in advance.
Creating a Dashboard from Imported File
In TURBOARD, users can export (through “Share” option) any TURBOARD element, starting from views, dashlets, dashboards and up to a whole showcase into an external file (a “.tur” custom file format specific to TURBOARD application) compressed inside a (.zip) folder.
This allows users to replicate such elements – instead of creating them from scratch, applying their analysis to another data source, and/or copy some elements into another TURBOARD environment – through importing the same file into TURBOARD again.
For dashboards in TURBOARD, when IMPORT FROM FILE option is used, this allows you to:
- Create a new dashboard for a different data source as a replica of another dashboard available at another data source. As you may prepare a dashboard with several custom filters, stylings, various components and elements, the “Import” feature allows replicating all such user-defined settings automatically and connecting them to another data source without the need to set them manually again in a similar new dashboard.
- Another use case for this feature is to allow you to analyze historical data and compare it with the latest data if your historical data is stored in another data source or database.
- It also allows you to copy a dashboard into another TURBOARD environment.
One condition is required to complete the creation successfully: the data tables in the new data source must have the same name and structure (fields/nodes) of those in the exported view file.
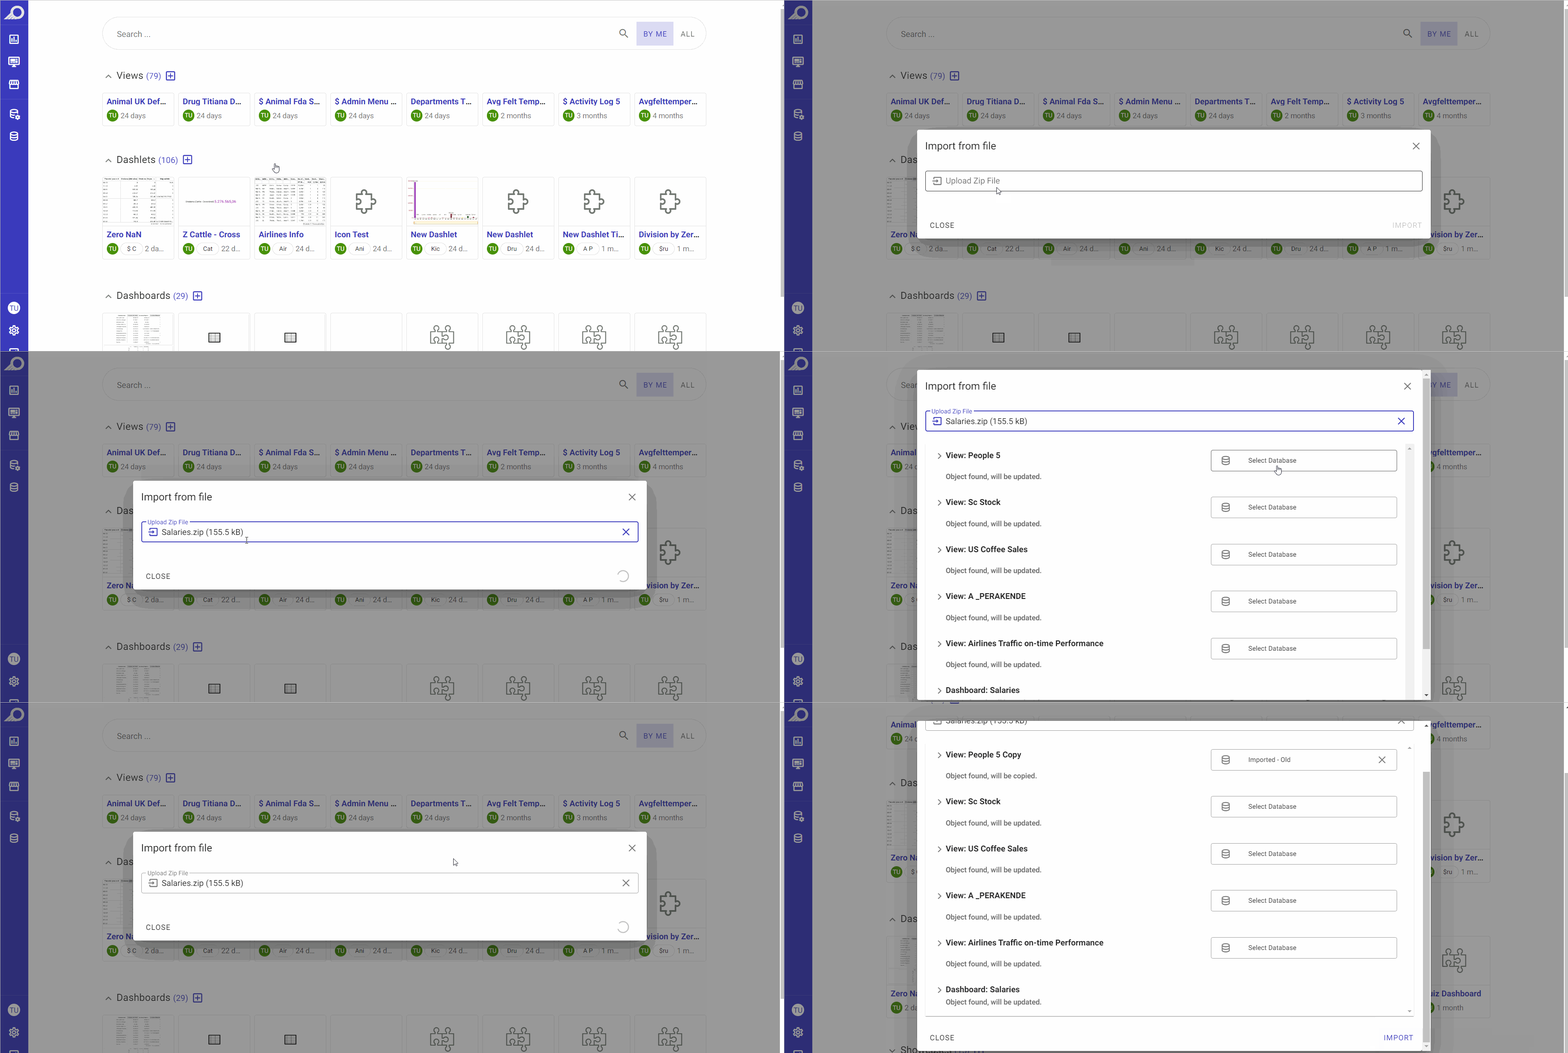
1 Go to Dashboards > + Create New Dashboard > click IMPORT FROM FILE option.
2 Upload the exported (.zip) folder that contains the “.tur” custom file. TURBOARD will automatically detect the tables, the data, the dashlets and the dashboard structure in the file and will apply them to the new dashboard. The structure and the detected elements (view elements, dashboard elements, etc.) will be listed in the overlay window.
3 From the Databases drop-down menu (Select Database), choose the target data source that you want to link the created dashboard to. All the data sources that are added to TURBOARD will be listed in the menu.
4 Click IMPORT button. The new dashboard will be created and connected to the target data source.