Theming
Default Theme
You can set a default theme for TURBOARD visualizations by selecting the preferred color schemes and the general style from up to 45 themes available in this section.
How to set a default theme for TURBOARD visualizations?
1 Go to Administration > Theming > Default Theme.
2 Click on the theme of your preference from the available theme blocks.
3 A window will open showing how all the visualization types in TURBOARD will look like upon applying the selected theme.
4 Click SET AS DEFAULT button to apply the selected theme, or choose another theme from “THEME” drop-down menu to view its color schemes and general style again.
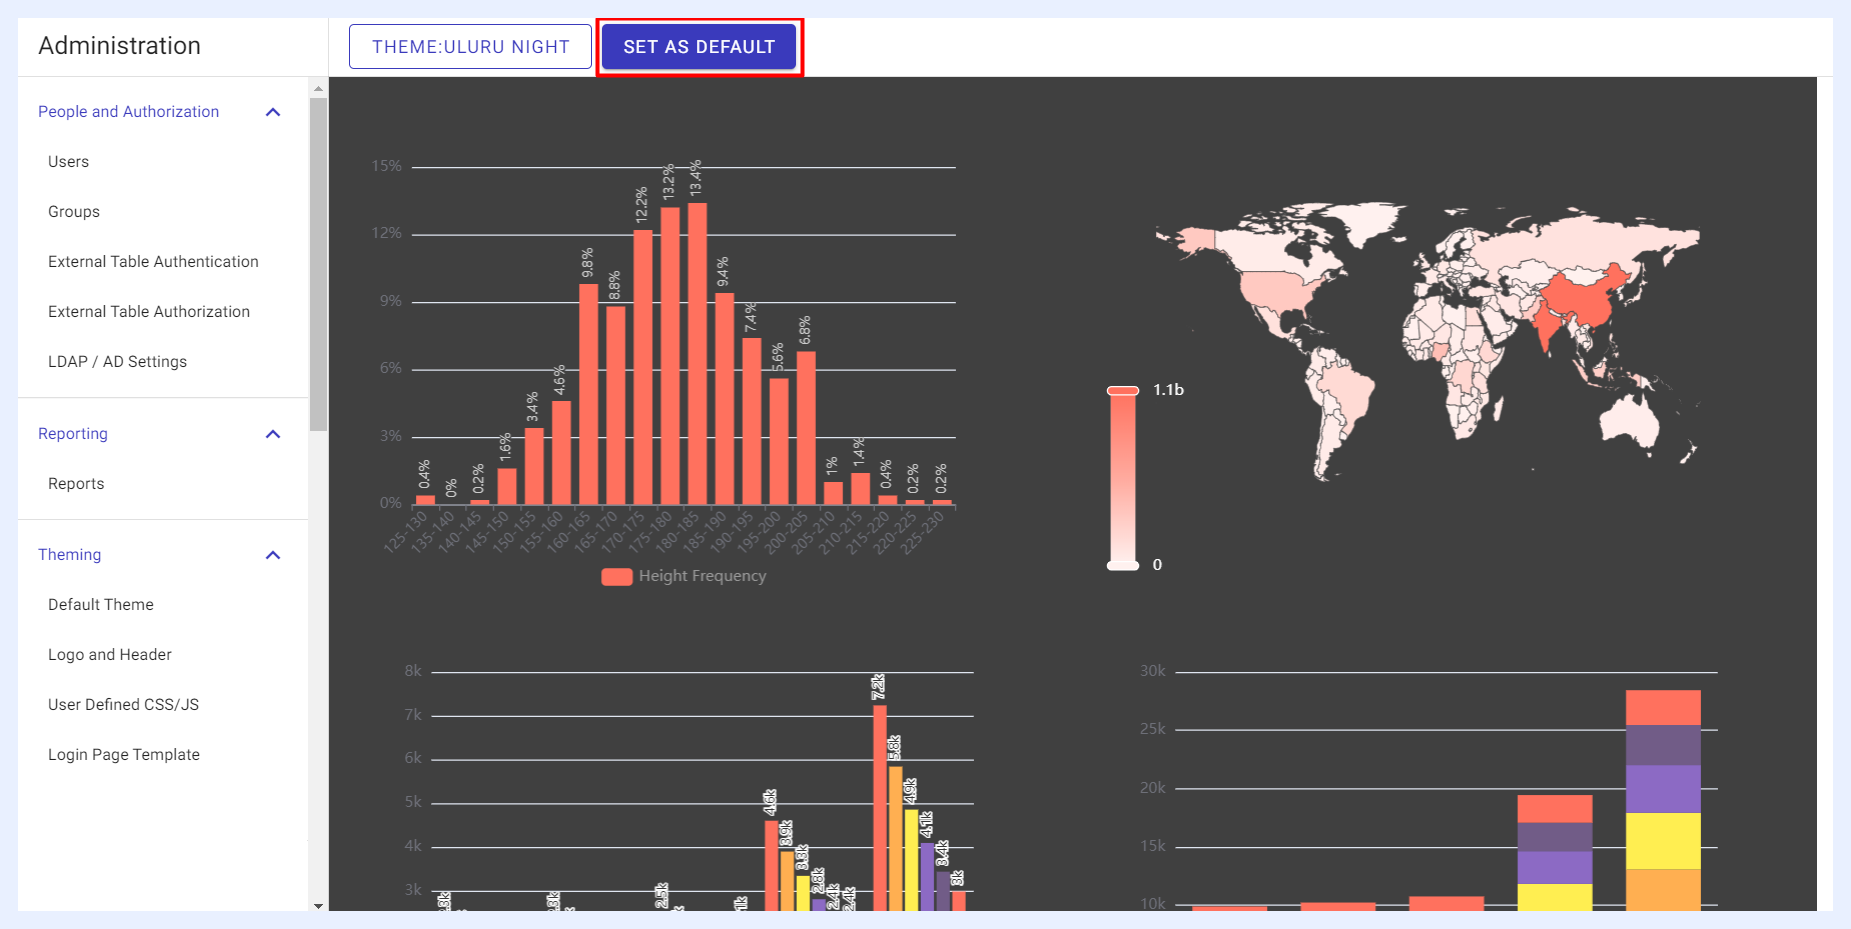
The chosen theme will be applied to all new visualizations in your TURBOARD environment, while existing ones will retain the previous default theme.
Note
While the chosen theme becomes the default for new visualizations in TURBOARD, designers have the flexibility to modify themes at the showcase level, and end-users can view their showcases using their preferred theme.
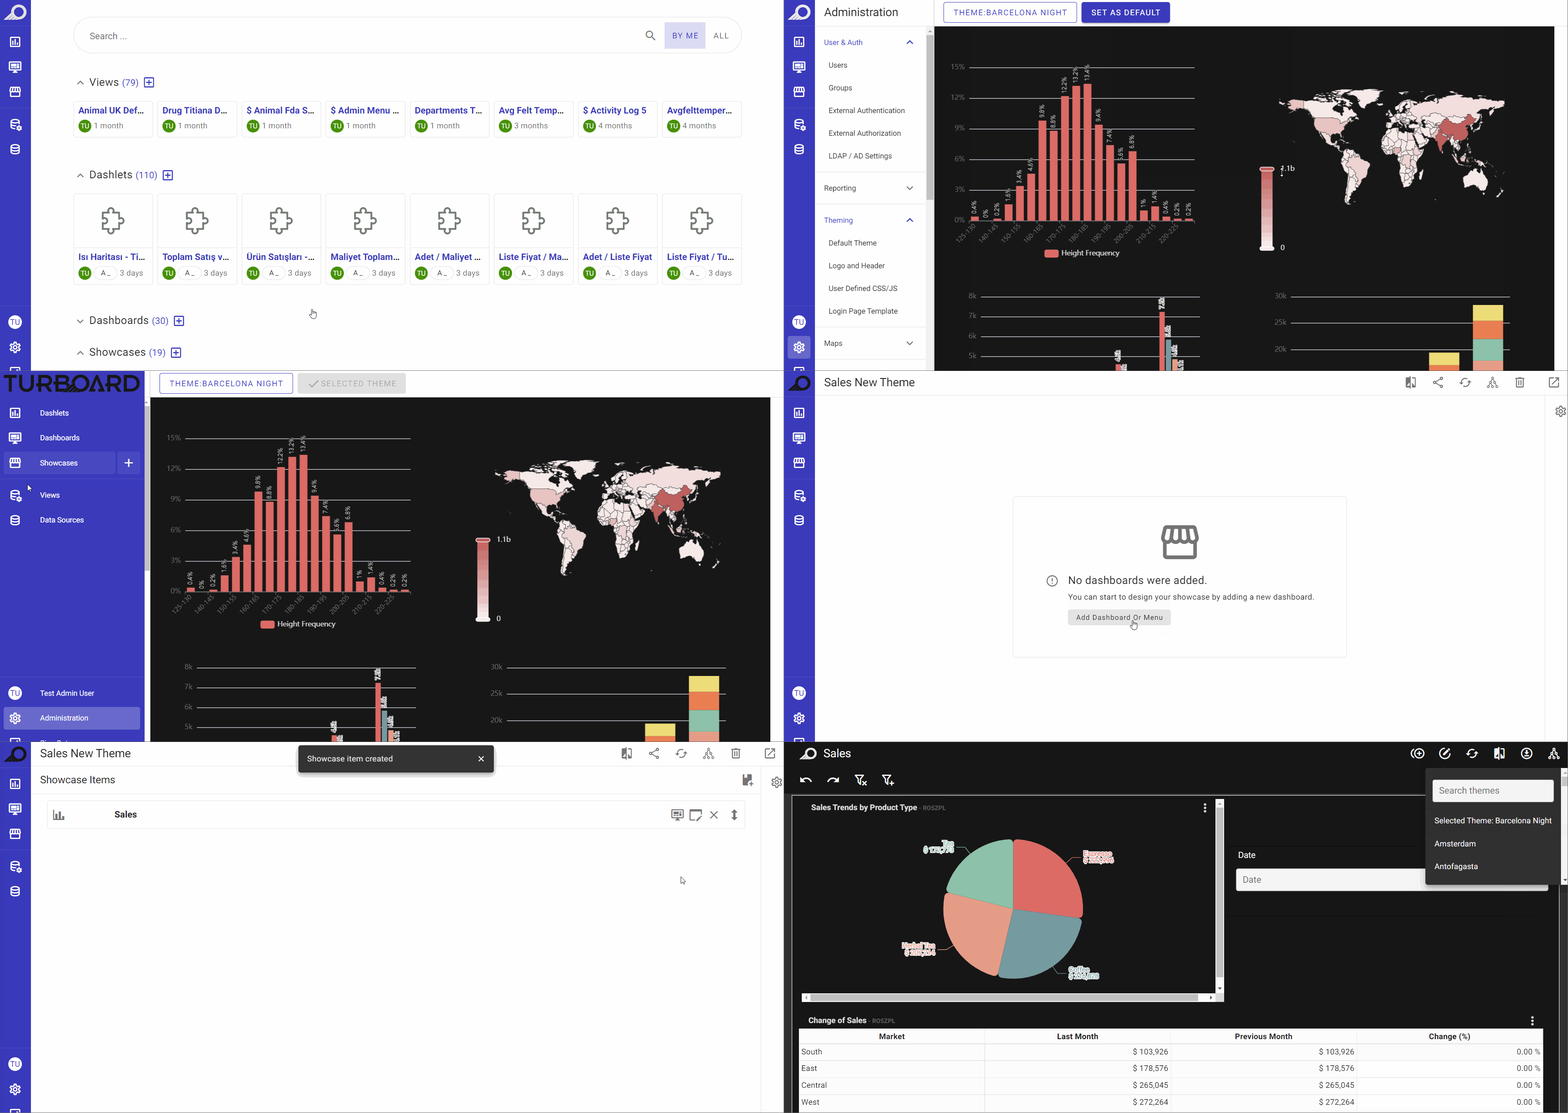
New Default Theme Applied on New Visualizations Created in TURBOARD
Logo Header and Color
Your company logo, tabs’ main title of TURBOARD webpages, logo-click hyperlink, your favicon and the logo on the printed reports, URL address bar, dark theme logos and mini logos, etc. can be customized under this option.
Note
Make sure to have your logo files ready and prepared in advance, as you will only need to upload them in this window. Their preferred sizes are explained in their related fields. The preferred format for the files is (.svg). Although other image file formats (.png, .jpeg, etc.) can be uploaded, the highest resolution logo images are those of type .svg.
Setting Up Your Company Branding
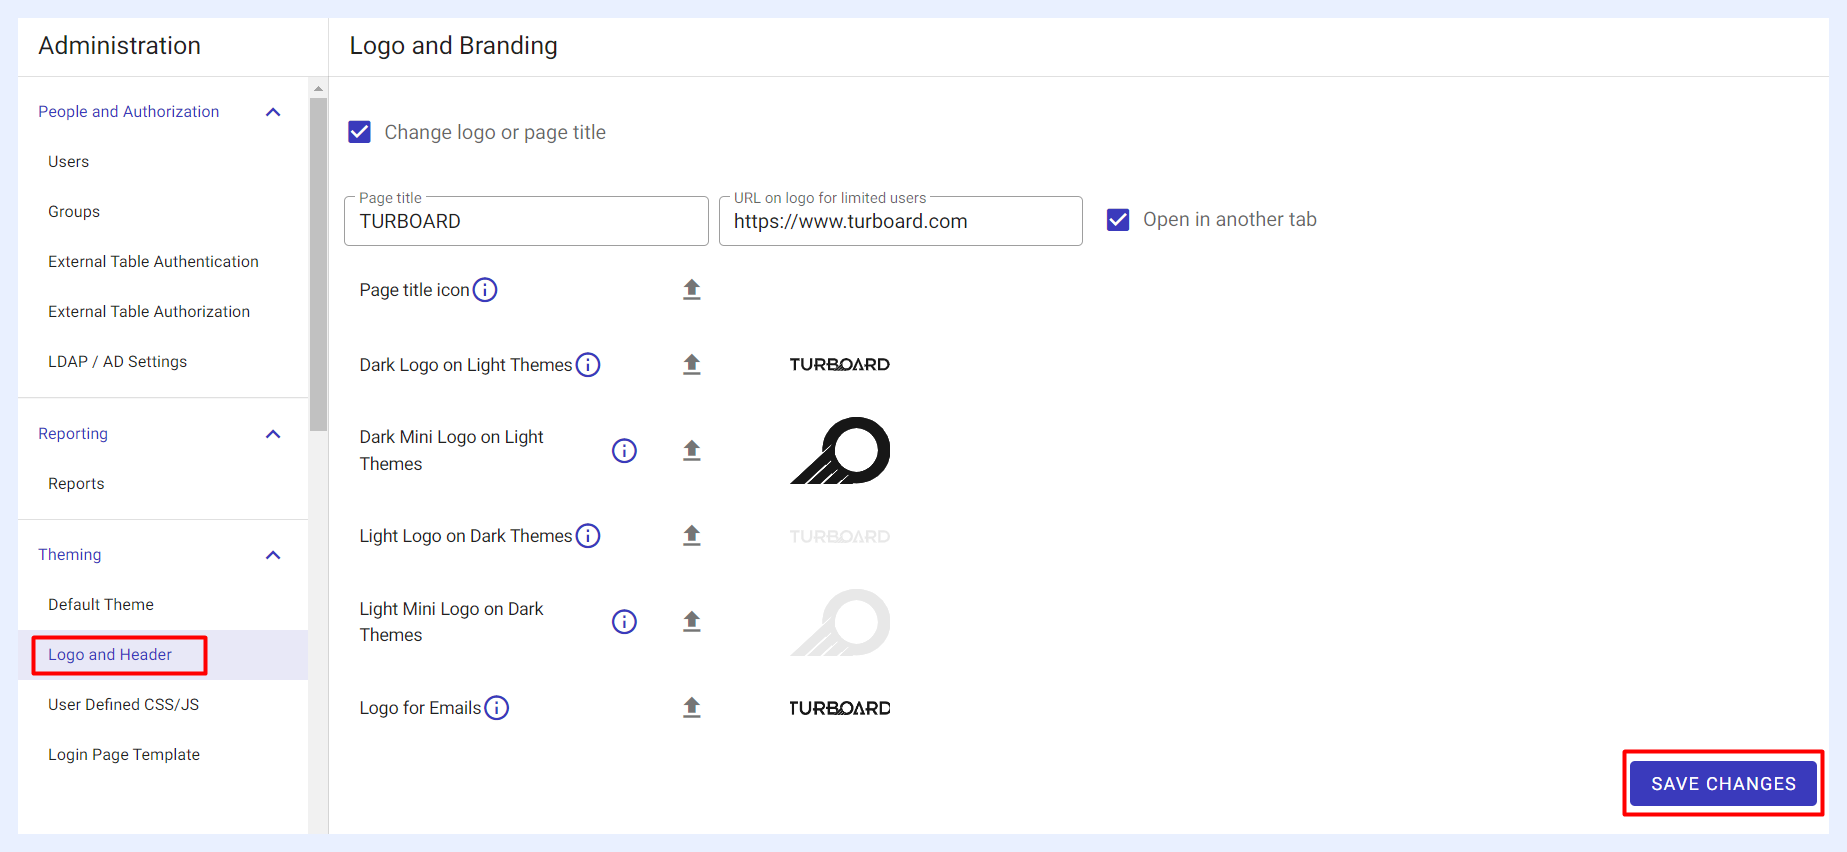
How to set the logo(s) and branding of your company?
1 Go to Administration > Theming > Logo and Header.
2 In the window that opens on the right, select “Change logo or page title” check box. If not selected, default logo and branding (TURBOARD logo and branding settings) will be applied on your TURBOARD environment.
3 In the related fields, fill in the title you wish to appear on your URL tabs/web pages, and the URL path that you wish to open when the logo on TURBOARD pages is clicked for limited users (i.e. users with public links).
4 Upload your company logos using the upload options for each logo type. Each field is self explanatory.
5 Click SAVE CHANGES button.
User Defined CSS/JS
This section allows the admin user to customize the general themes and styles of TURBOARD pages, in addition to giving permission to Designer users to use JavaScript codes while working on designing their dashboards.
Enabling Custom CSS/JS
“Add Custom CSS/JS” check box:
When this check box is checked, it allows the Admin user to customize or change the appearance and designs of various elements in TURBOARD’s web pages using custom CSS (Cascading Style Sheets).
For example, you can change the font size and/or color of TURBOARD pages’ titles or headers to a styling of your own preference.
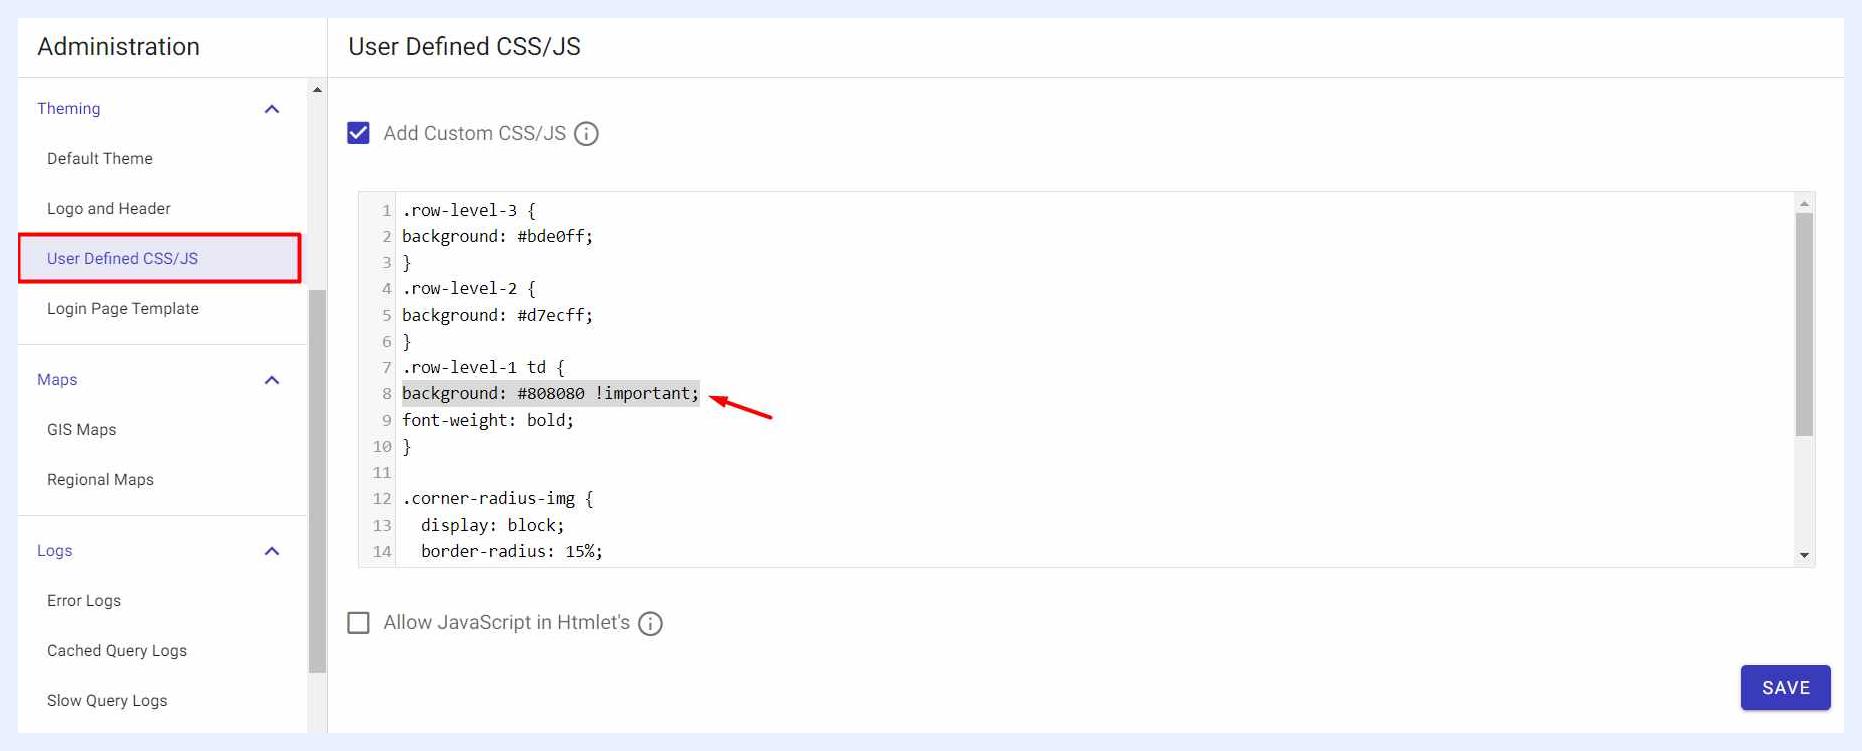
You can write the required CSS script inside the HTML editor, then click SAVE button.
You may need to use the “!important” declaration for the elements that you want to change in order to override the default styles and have your changes applied.
You can find the correct selectors for the elements that you desire to modify using the browser developer tools (“Inspect” the HTML and CSS of TURBOARD webpages).
When this option is disabled (its check box is unchecked), the default CSS and styles will be applied to TUROARD pages.
Enabling JavaScript in Htmlets
“Allow JavaScript in Htmlet’s” check box:
Htmlets are customized elements that can be added by Designer users to dashboards using HTML scripts. They are basically custom-added HTML dashlets and are dynamic elements in dashboards.
When this check box is checked, it allows the Designer users to write JavaScript codes within the HTML editor and apply it to the Htmlet in the related dashboard.
This option allows using JavaScript code within HTMlets and can provide a wide range of functionalities to end-users, but it can create security vulnerabilities that may compromise the safety of your TURBOARD website. It can also be exploited to perform malicious actions such as redirecting users to phishing sites. Therefore, the Admin user shall use this option with caution and at the user's own discretion.
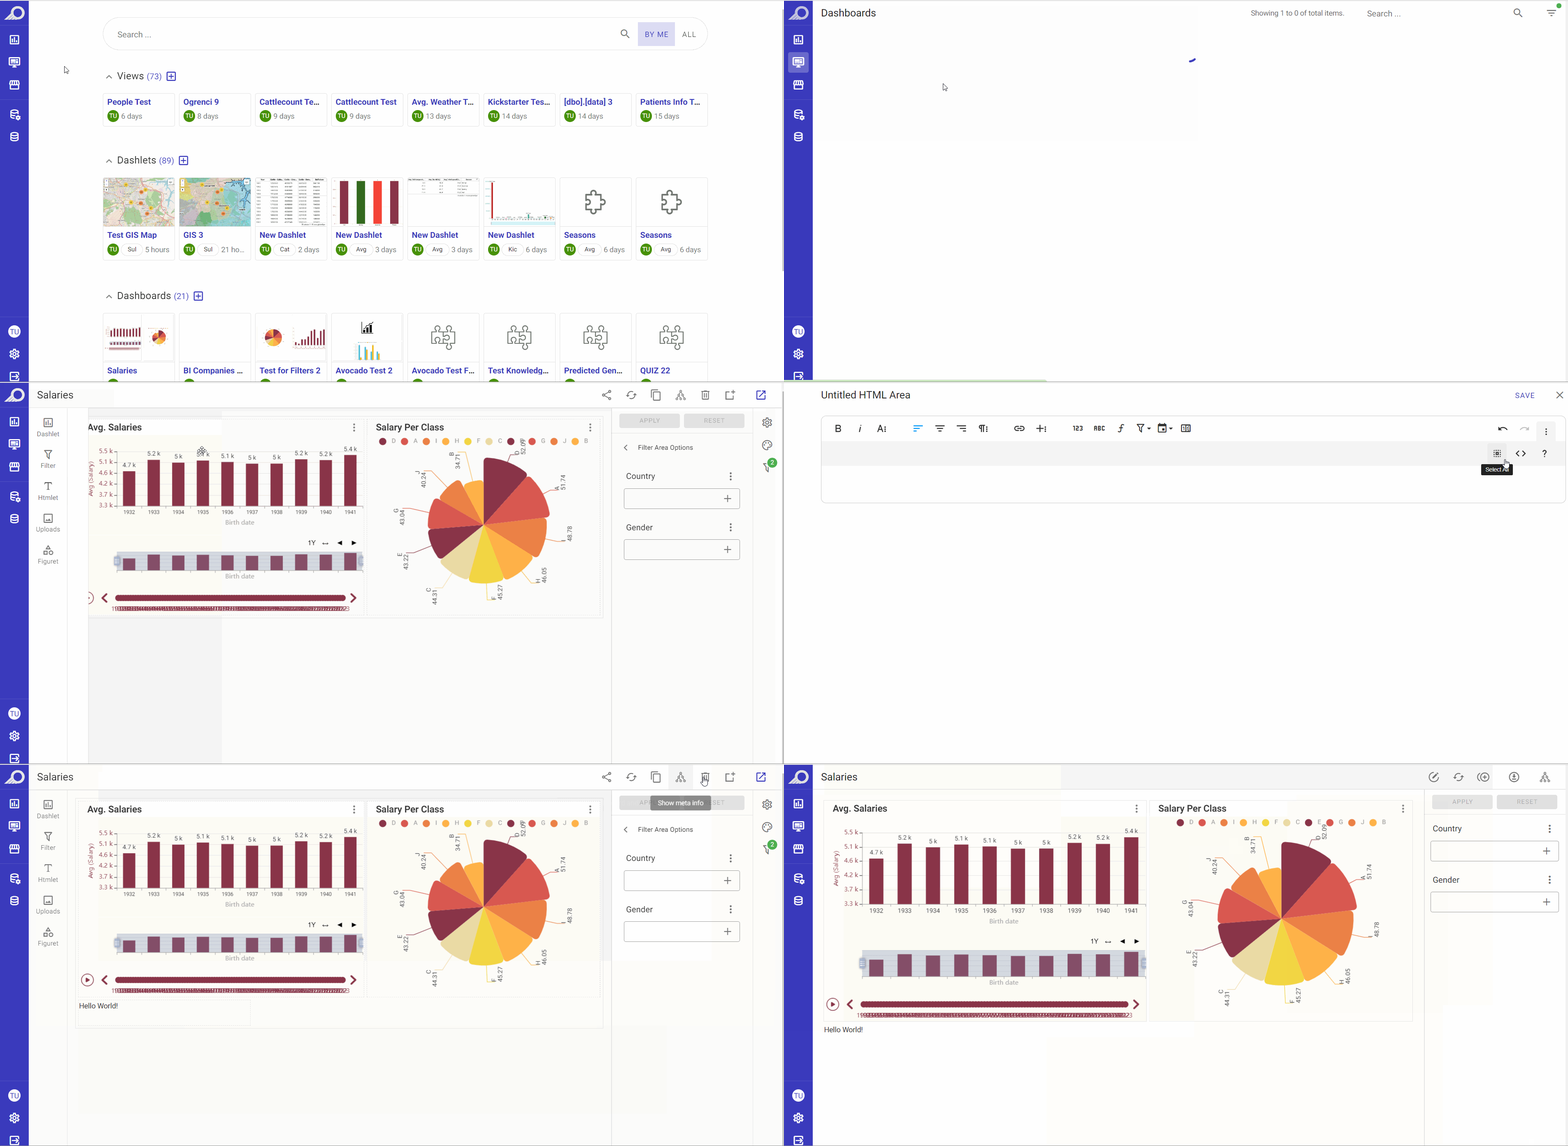
JavaScript enabled in Htmlets - Sample of an affected Htmlet in a Dashboard
Note
If “Allow JavaScript in Htmlet’s” option is unchecked or disabled, a Designer user can still write JavaScript code in the HTML editor and save the changes. However, TURBOARD will not apply the JavaScript code and will ignore it.
Login Page Template
The default page design to login to TURBOARD is as below. However, the admin user can change its design and customize it according to his/her preferences.
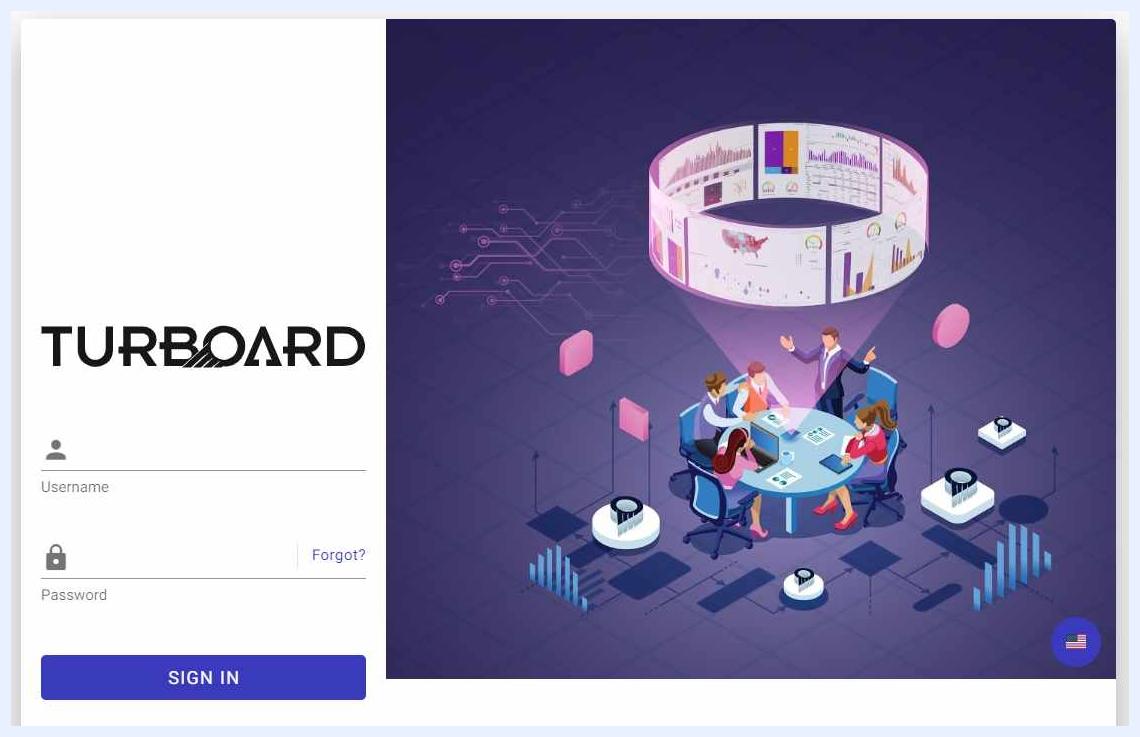
Default Login Page Design for TURBOARD Users
How to customize your TURBOARD environment login page?
1 Go to Administration > Theming > Login Page Template.
2 Check “Enable custom login page” check box in the window that opens.
3 Write/edit the HTML script and add HTML elements as required in the HTML mult-line field that appears below the check box. You can use Vuetify frameworks for appropriate HTML design as an example.
4 Click SAVE button once done.
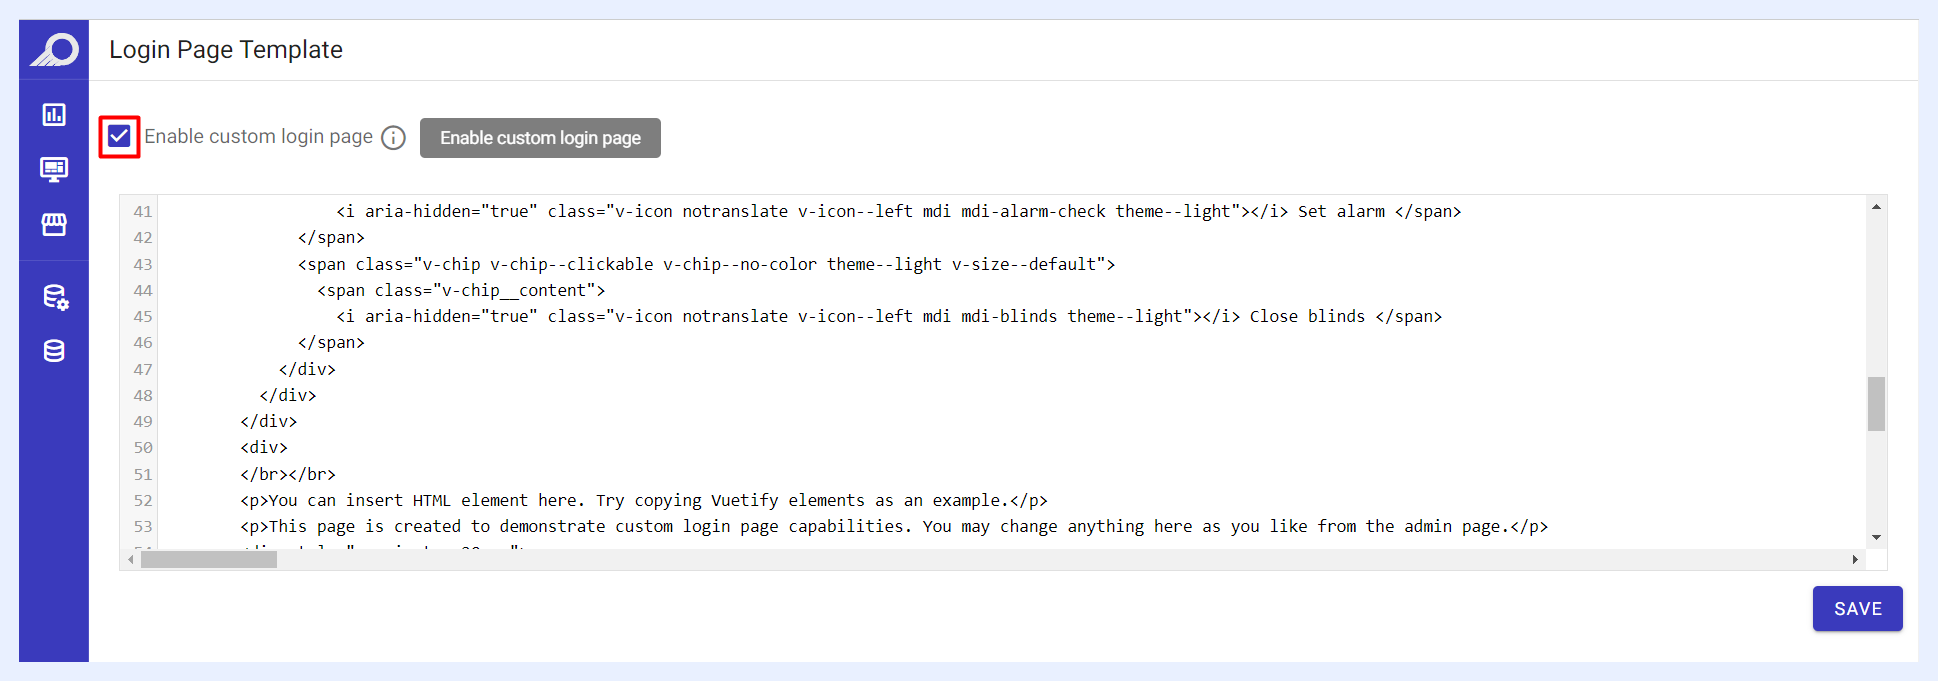
Your HTML custom designs will take place in the users’ login page as the below example:
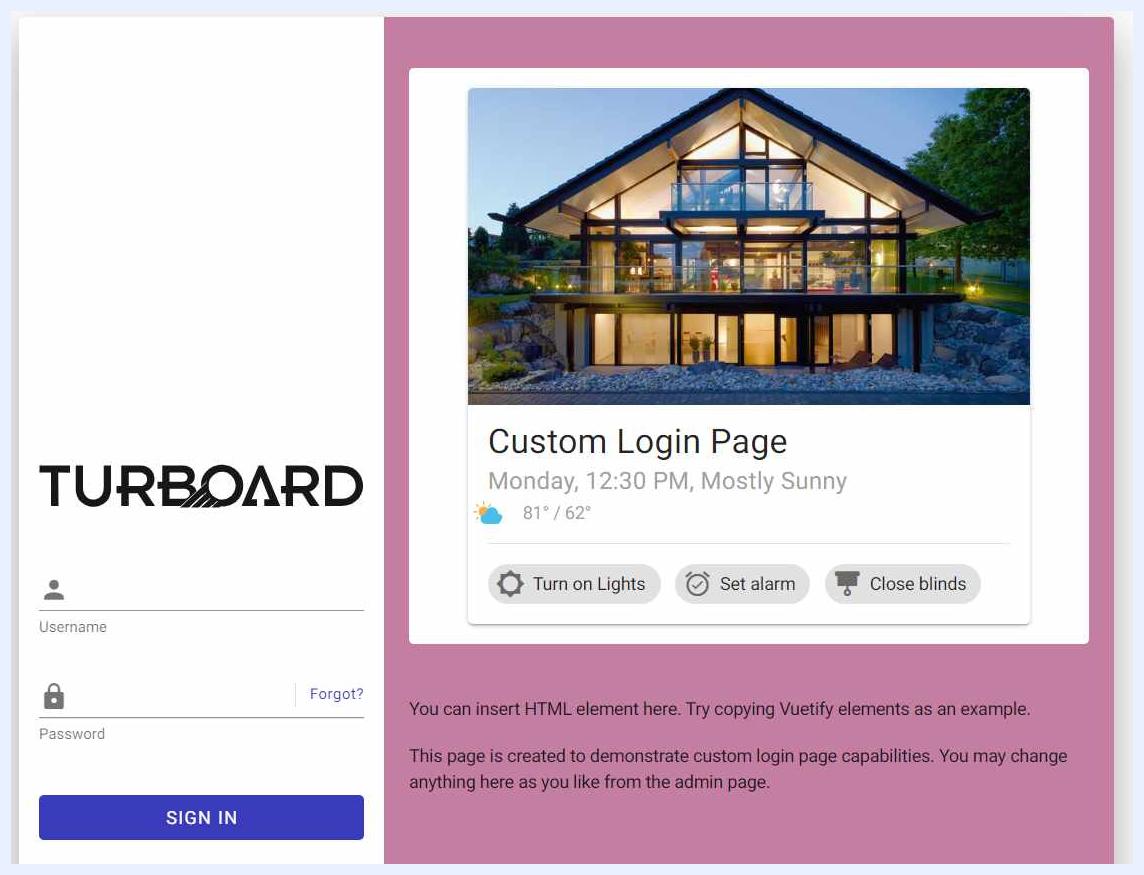
A sample of a customized login page