Forms for Respondents
Accessing Forms
Respondents can easily locate forms either assigned to them or those available publicly for all users within their “Forms” tab. To access a form, they can click on the form’s title or its cover image (when using the “Image Card” view). This action opens the form’s answer window.
In addition, depending on the “Notification Settings” configured by the administrative user, respondents are promptly informed via SMS and/or email when a new form requires their attention or if a submitted response needs to be revisited and resubmitted. These notifications conveniently include a direct link to the form’s response page, facilitating immediate access and action.
Answering Forms
The method by which respondents can answer a form depends on the “Answer Type” settings established by the form creator.
UI Answer Method
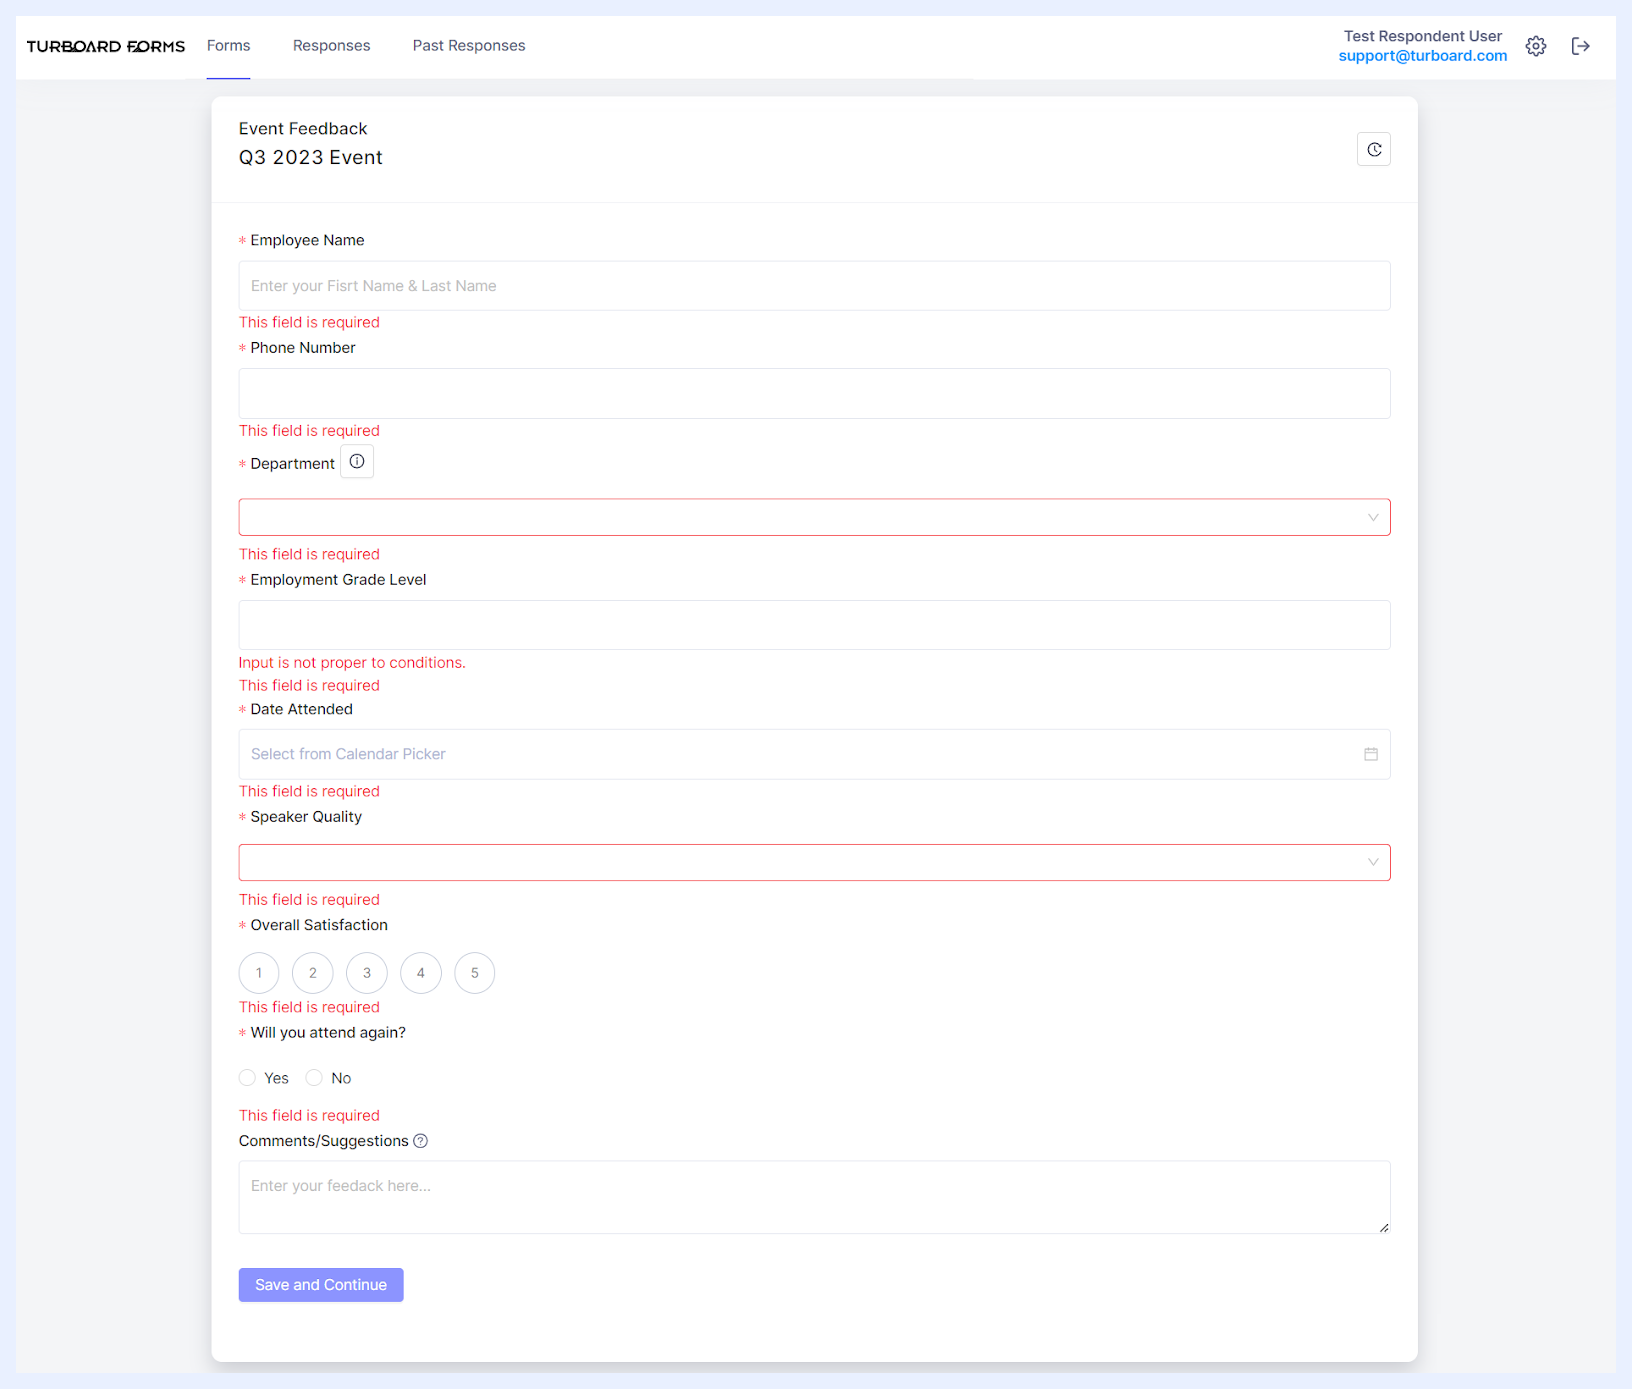
If the “UI Answer” option is set, the answering interface with the required fields appears directly within the system. Here, respondents can input their answers directly into the online form. Upon completion, clicking the Save and Continue button submits their responses.
Note
The system performs checks when the Save and Continue button is clicked, ensuring all mandatory fields are completed and verifying if any data are entered incorrectly. Notification messages will alert respondents to any errors or missing information.
File Answer Method
In situations where only the “File Answer” method is permitted for a form, the answer window will display instructions on how to handle the file download and upload process. The text guiding the respondents will be: “This form is set up to be answered by download/upload template files only”.
File Answer 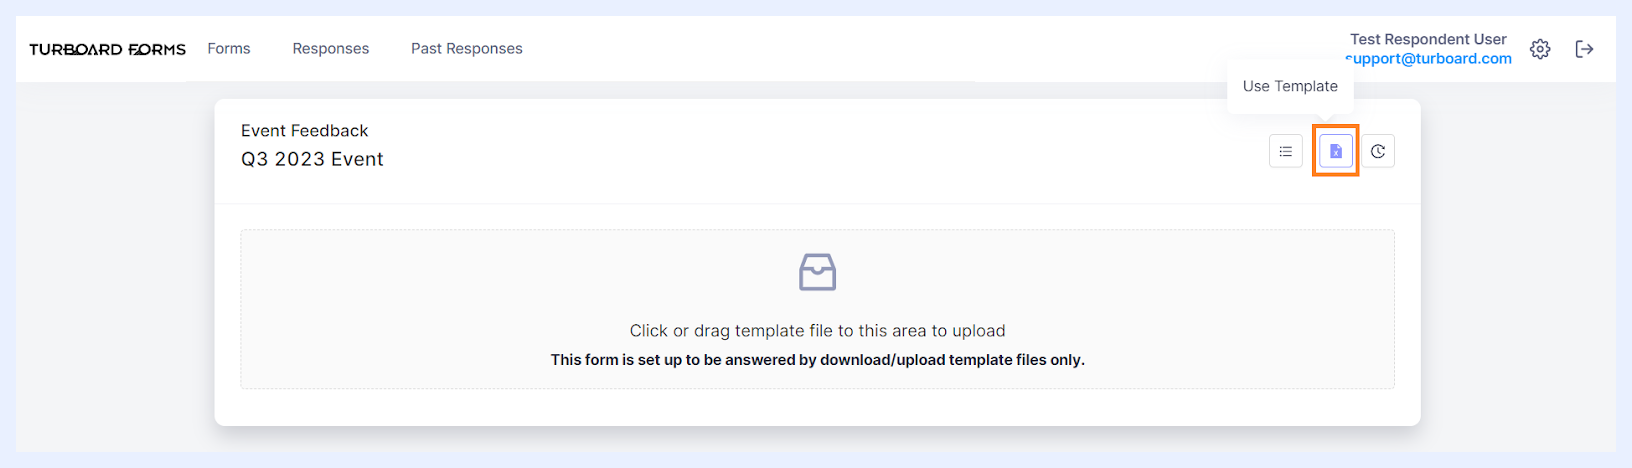
How to Answer a Form using the File Answer Method?
1 Click on Use Template icon at the top-right of the Answer page.
2 A pop-up window titled “Use Template” will open.
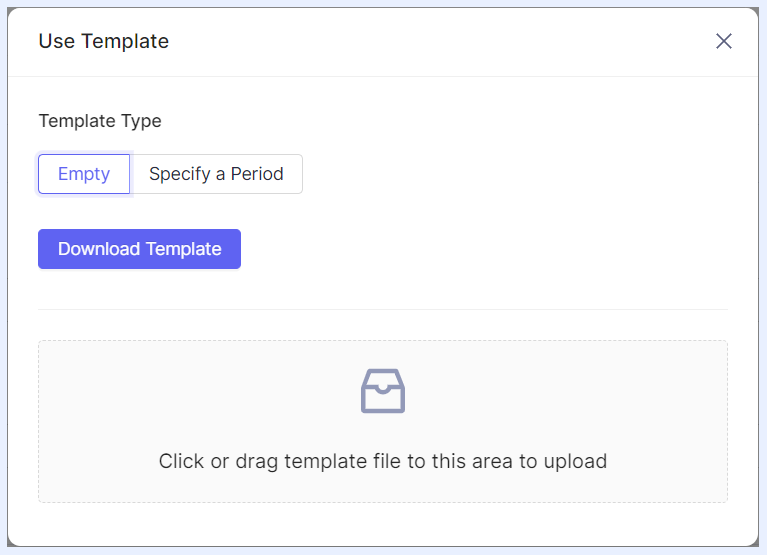
3 Choose the Empty option and press the Download Template button.
Note
The Specify a Period option is useful for forms tied to a certain predefined period and previously answered by the respondent. Selecting this option downloads the template containing the latest submitted responses, aiding in revising or re-answering the form efficiently.
4 The form will download to your computer. Open it and enter your answers.
Note
Cell formats in the template automatically align with the answer type settings. For instance, if a question requires choosing an answer from a drop-down list, the corresponding cell in the template will feature a drop-down menu with available answer choices.
5 Once completed, return to the form answer window and upload your file.
Note
After uploading, the system will check for missing mandatory fields or wrong formats. If there are any errors, it will notify you to make corrections.
6 Correct any errors in your file if necessary and upload it again.
7 Once everything is correct, click Save Responses button to submit your answers.
Both Answer Method
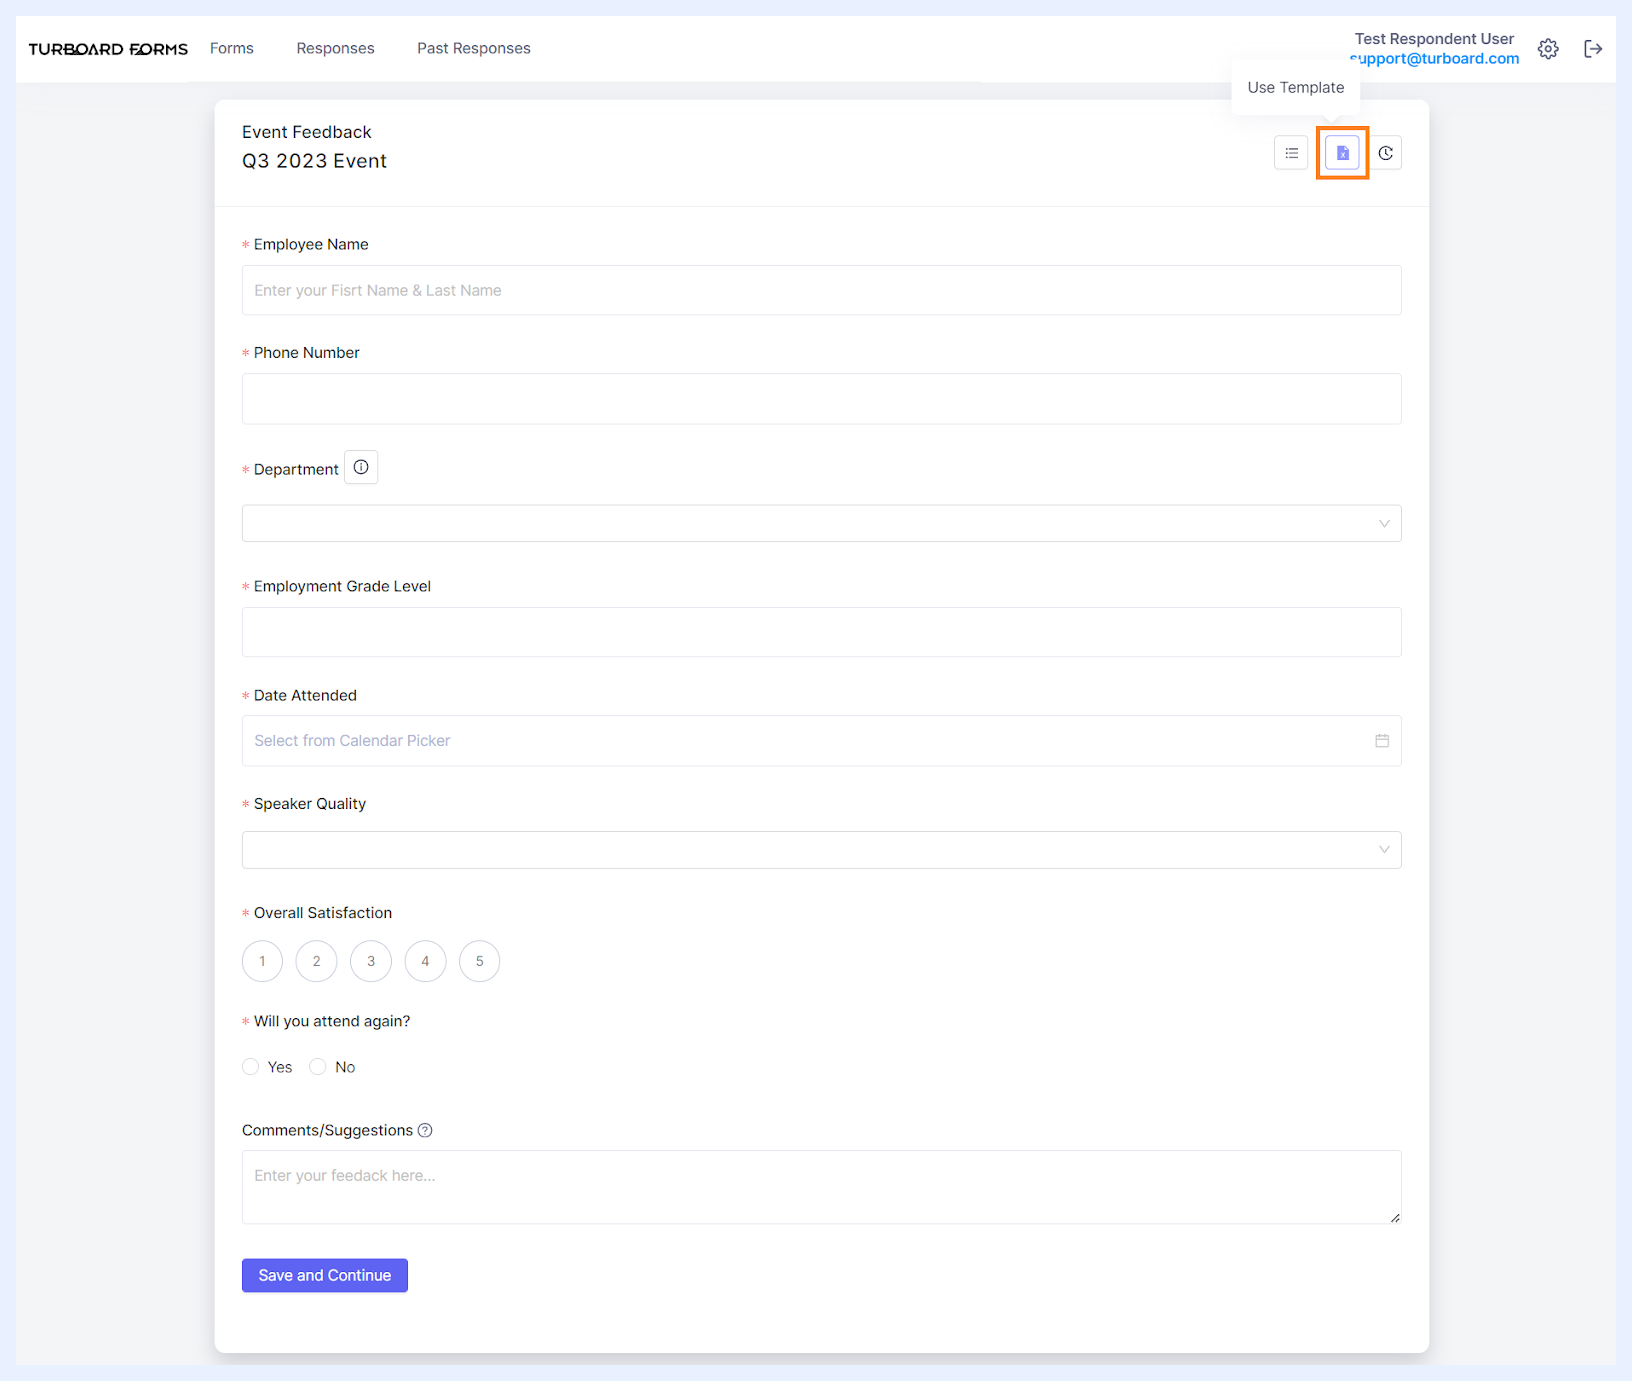
When the “Both” answer option is enabled, the form will open with an interface showing all the required fields for direct input.
Additionally, a “Use Template” icon will be available at the top-right corner of the answer window. This feature allows respondents to alternatively download the Excel template of the form, complete it, and then upload the filled template back into the system. Click here for more on this answer method.
Other Options for Respondents
In addition to the primary answering methods, respondents have access to several auxiliary features situated at the right-top of the answer window. Alongside the “Use Template” icon, the “Download Questions” and “Responses” icons provide further options to manage and streamline the form-filling process.
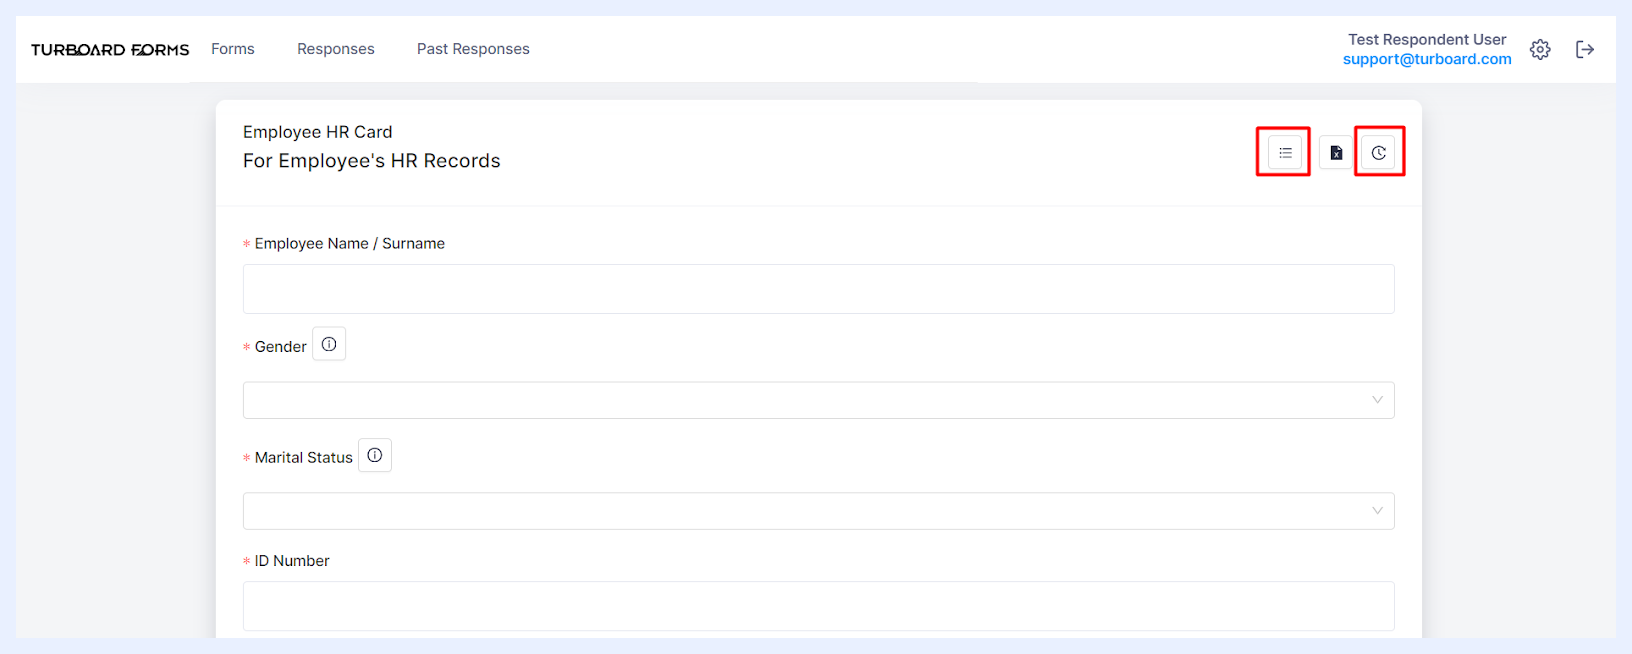
Download Questions: Accessible only in forms enabling answers through download/upload (File Answer) methods, the “Download Questions” icon lets users download the form's questions in an Excel format, along with their last set of submitted answers. This feature is particularly handy for reviewing previous submissions or preparing updates to submitted answers.
Responses: Interacting with the “Responses” icon unveils a drop-down menu offering multiple functionalities:
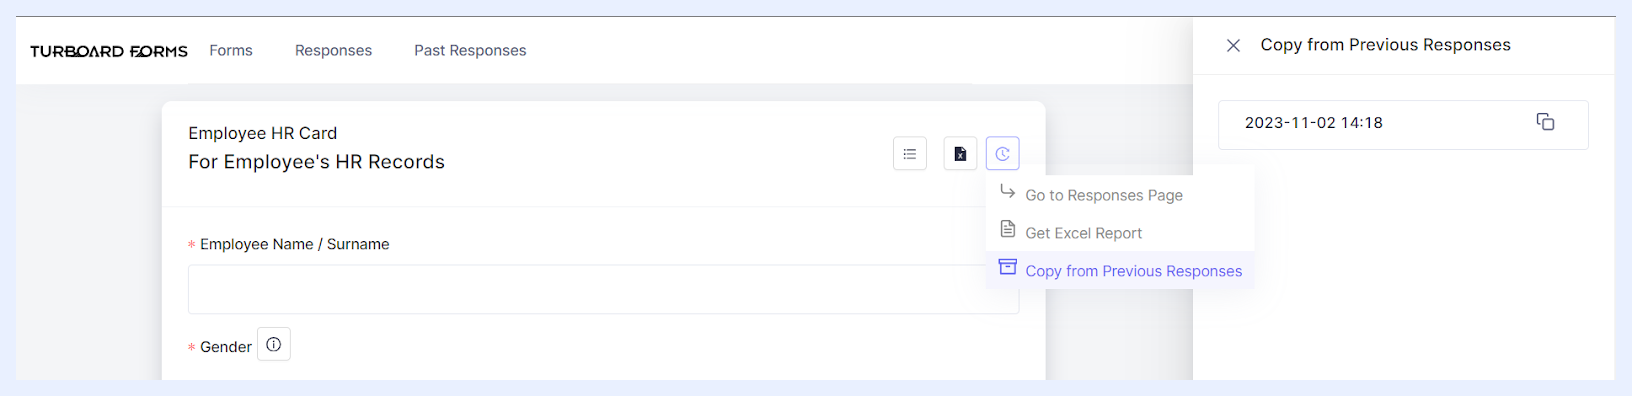
- Go to Responses Page: when selected, it leads the user to the “Responses” tab. Here, users can gain an overview of their interaction history with various forms, simplifying the tracking and management of their submissions.
- Get Excel Report: when selected, it enables users to download a comprehensive report in Excel. This report compiles all past submissions, neatly detailing each response’s submission date and time, along with the username of the respondent.
- Copy from Previous Responses: when selected, a side window opens displaying all past submissions, each timestamped. By clicking the copy icon beside a submission, users can conveniently replicate these responses into a new form submission. This option streamlines the process for forms requiring regular or repetitive data entries and is available exclusively for forms answerable through the UI interface (UI Answer).