Managing Forms
After crafting your form, whether 1-Dimensional or 2-Dimensional, it's crucial to ensure its settings align with your data collection objectives. The Forms Module offers a vast array of form-level settings, enabling you to customize respondent interactions, data collection methods, form availability, and more.
Editing Form Main Settings
1 Within the form's “Edit” interface, click on the Edit form details settings icon.
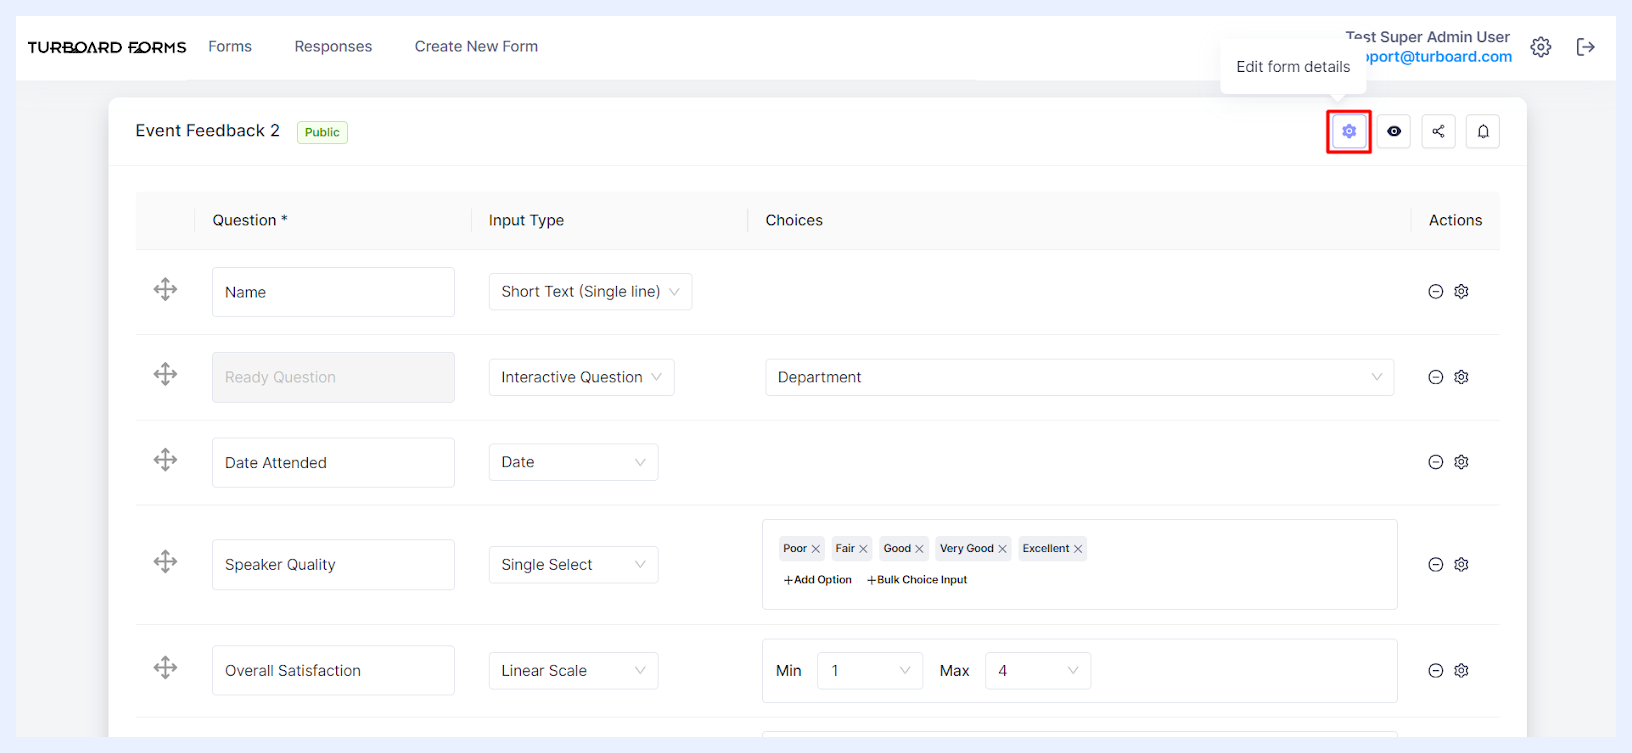
2 The “Edit form details” side panel will appear, allowing you to modify various form attributes:
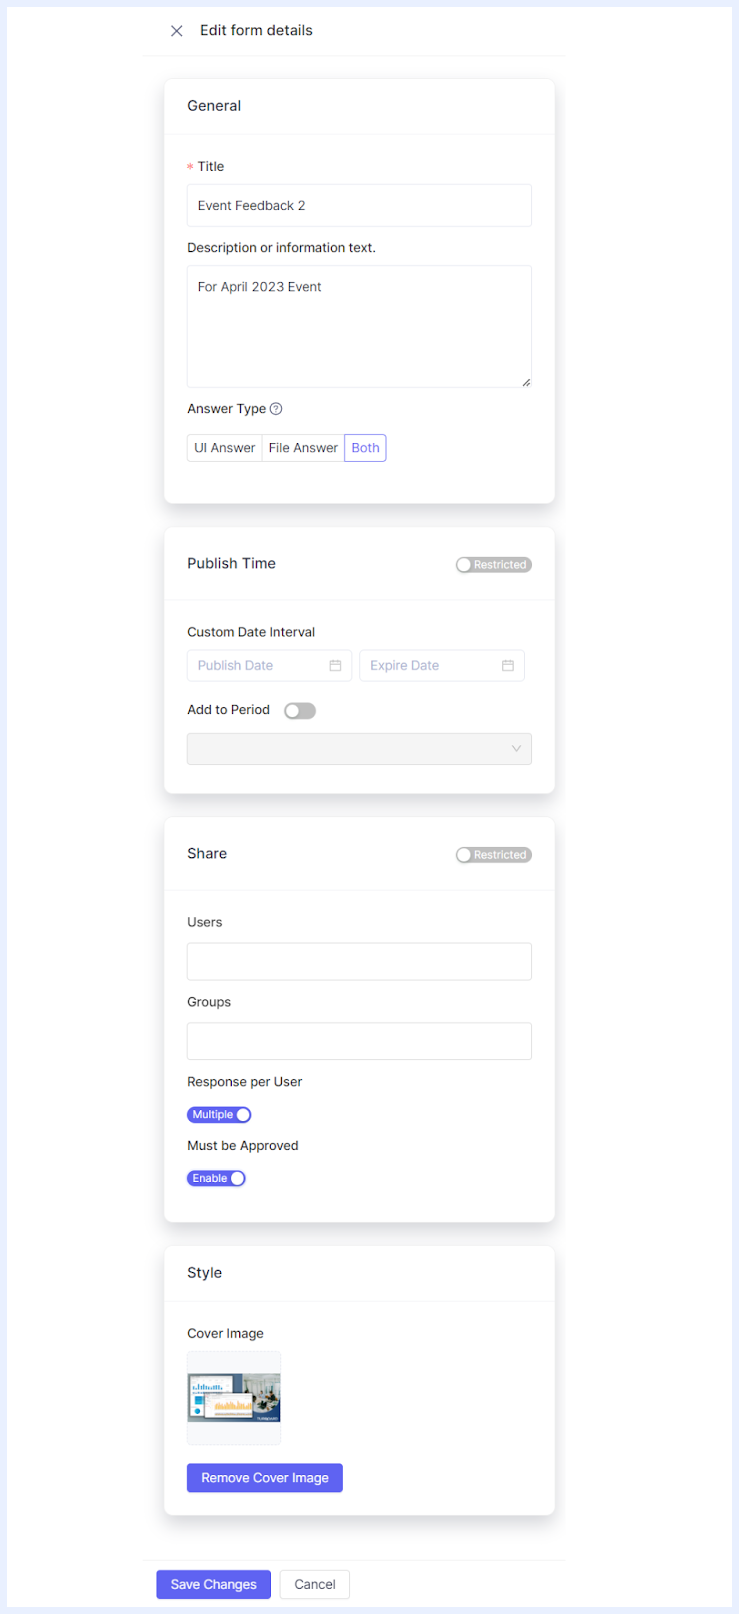
- Title: Update the form's title if you wish to change it from what you initially set.
- Description or Information Text: Modify the form's description or any supplemental information. This can be updated or added even if none was provided during the form's creation.
- Answer Type: Define how respondents should engage with the form by selecting one of the following options:
- UI Answer: If chosen, this signifies that respondents will complete the form directly through its online interface.
- File Answer: With this selection, respondents will need to download the form's questions as an Excel template using the “Use Template” icon. They'll fill out this Excel sheet offline and then upload it to the form. In this mode, the form's online interface will not display fields for direct input. Instead, guidance text will instruct respondents on the download/upload procedure, reading as: “This form is set up to be answered by download/upload template files only”.
- Both: This option lets respondents decide between completing the form online or using the Excel template method. By default, the “Both” option is set when the form is first created.
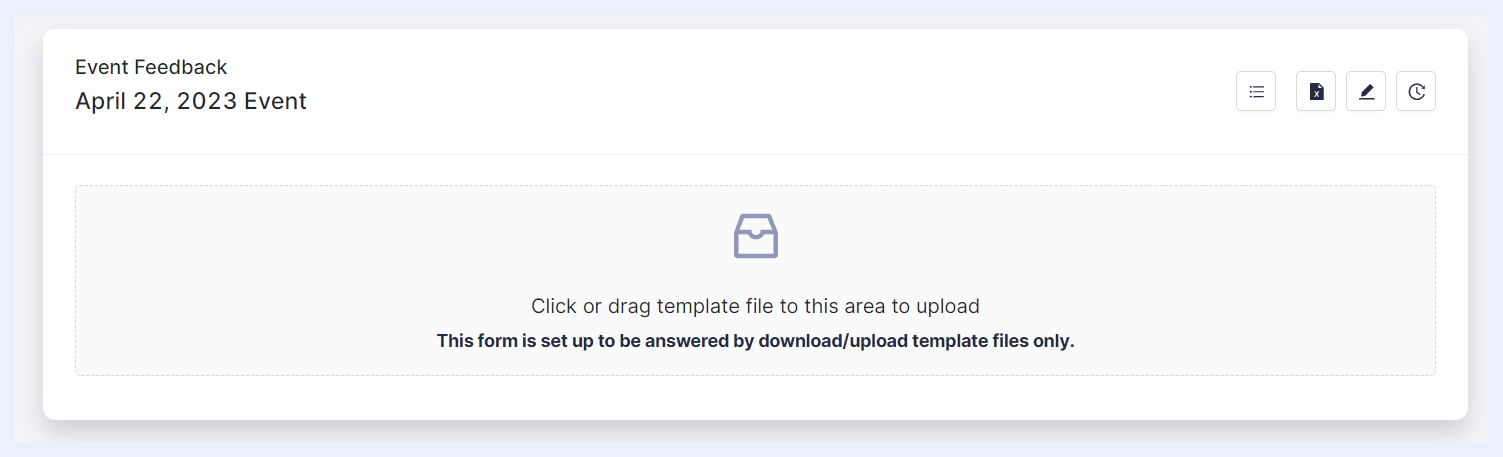 How a form will appear to Respondents when selecting “File” Answer Type
“Use Template” Icon Explained
The “Use Template” functionality facilitates downloading the form's questions into an Excel file format. If a respondent hasn't yet answered the form, the downloaded file will contain blank fields for their responses. Conversely, if the form permits multiple submissions or necessitates mandatory approval and confirmation before closing response edit and submission, the file will include the respondent's most recent set of answers.
Opting to allow respondents to answer forms via Excel or CSV file uploads and downloads brings several significant benefits: - This method enables respondents to input data in large quantities, enhancing efficiency, particularly when dealing with substantial data sets or numerous entries. It's especially beneficial since many are already familiar with Excel. - The feature also supports offline data entry. Users can download the template, complete it without an internet connection, and upload it once they regain online access. - Additionally, it reduces repetitive manual data entry. Respondents have the option to retain or copy their previous answers in the template, streamlining the process.
Note
For 1-Dimensional forms, the “Use Template” icon is visible only for forms that allow multiple answers. When answering is restricted to a single submission, respondents can readily fill and submit their responses through the UI interface.
Further insights into how respondents interact with forms, depending on the chosen “Answer Type,” are detailed in the “Forms for Respondents” section.
Forms Publish Settings
Publish Time: By default, upon creation, a form is set to “Always”, signifying its perpetual visibility to respondents. However, if you wish to limit the form's accessibility, you can change the setting from “Always” to “Restricted,” allowing you to specify the desired duration of availability:
- Custom Date Interval: This option lets you handpick the form's “Publish Date” and “Expiry Date” using calendar pickers.
- Add to Period: The module's main “Settings” let you define specific periods, which then populate as a drop-down list in this section. Administrators can easily choose from these pre-configured periods to set the form's accessibility. For instance, an organization conducting quarterly reviews could pre-define periods like “Q1 2023” or “Q2 2023”. This streamlines form availability for specific quarters, ensuring consistency and minimizing manual input.
Note
If a form's visibility is confined to a predefined period, notifications are automatically dispatched to the assigned users at the commencement of that period, as per the “Notification Settings” configured in the “System Settings” section.
Sharing Forms with Respondents
Share: By default, a new form is set as “Public,” allowing all respondent users within the system to view it. If you prefer to keep the form hidden from users until its details are finalized, you can switch its status from “Public” to “Restricted.” Additionally, for more specific control, you can determine individual access by selecting certain users via the “Users” drop-down list or choosing entire groups through the “Groups” drop-down list.
Note
Once a form is published or specific users/groups are designated for a form (meaning it's no longer hidden), the system will automatically send notifications to the respective users via e-mail and/or SMS (according to the determined “Notification Settings” in “System Settings” section). Additionally, the admin user retains the capability to send notifications manually using the “Notify” option.
Further customization can be done under the “Share” section with the following options:
- Response per User: This option appears for 1-Dimensional Forms only as 2-Dimensional Forms allow multiple responses by default. In 1-Dimensional Forms, the “Unique” setting ensures that each user can answer the form only once. In contrast, the “Multiple” setting allows users to respond multiple times until the form's expiration.
- Must be Approved: This can be toggled between “Disabled” and “Enabled”. When enabled, confirmer users have the authority to review and approve form responses, adding an extra layer of verification.
Note
During system setup, each user is assigned a specific confirmer user. Only this assigned confirmer user will have the privilege to see and review the responses submitted by their respective user(s).
Forms Styling
Style: Personalize the appearance of your form card as it's displayed to users in the “Forms” tab for “Image Card” views by uploading a cover image. To do this, click the + Upload button and select the desired image file from your computer. If you wish to revert to a default look or choose another image, use the Remove Cover Image button.
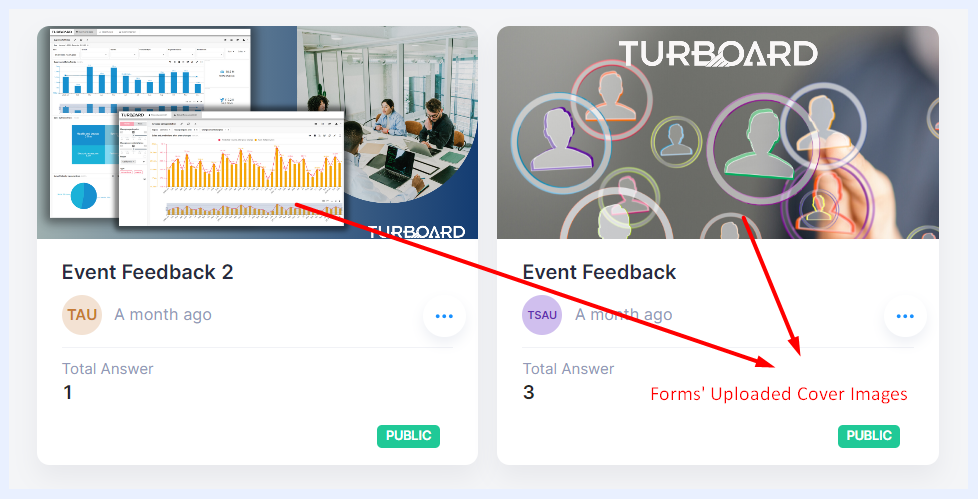 How forms will appear in “Forms” tab with their uploaded Cover Image
Once you're satisfied with all your form's settings, finalize them by clicking the Save Changes button.
Additional Form-Level Settings & Options
When fine-tuning your form for respondents, the form editing interface presents a series of action icons located at the top-right. These icons provide quick and convenient access to specific functionalities, ensuring a smoother management process.
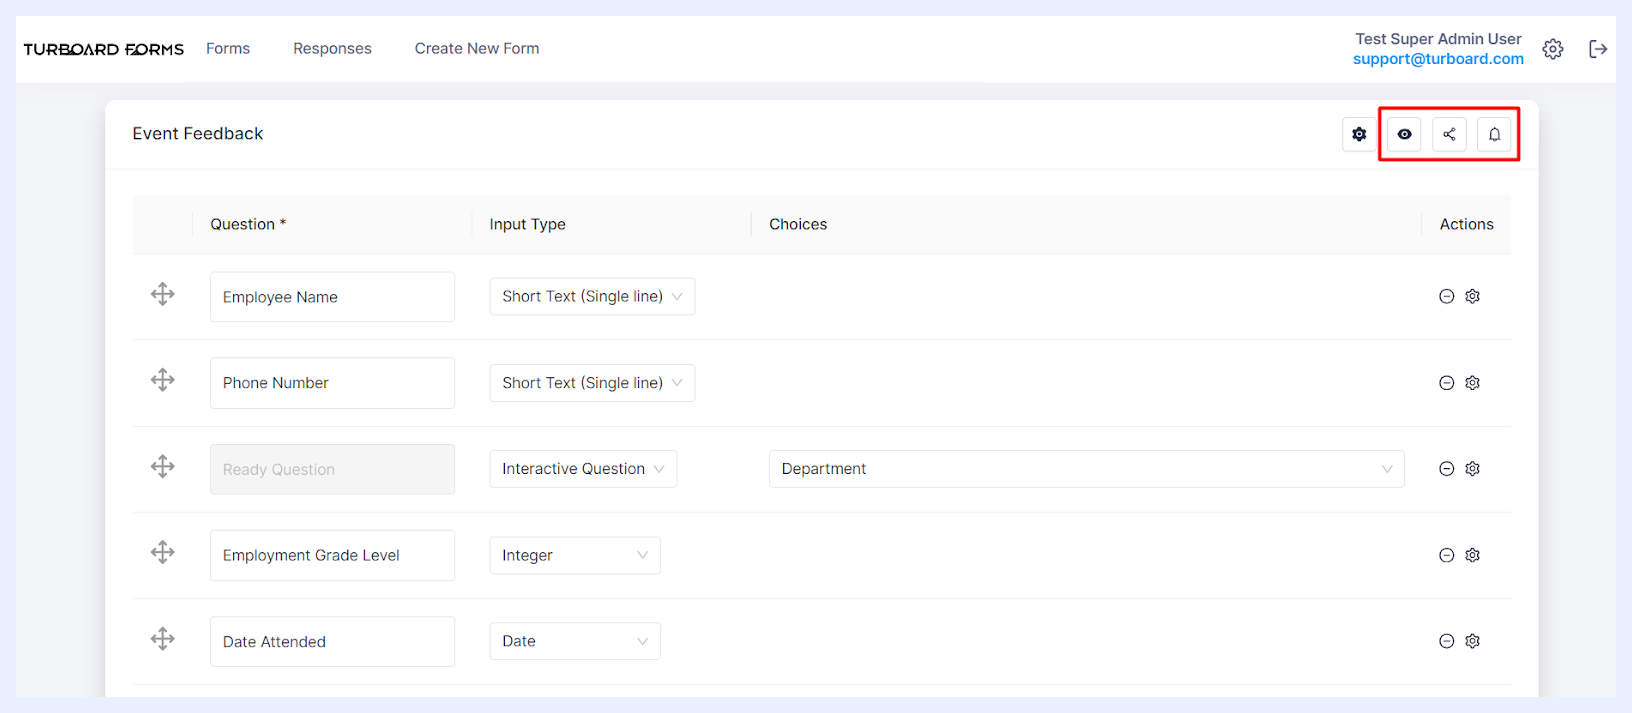
 Answer:
By clicking the “Answer” icon, the form's answering mode/window will open. This action opens the answering window, allowing the admin user to fill out the form.
However, if the form isn't set to public and the admin user isn't among the designated respondents, the
Save and Continue button will be inactive. Hovering over the button will show a tooltip/notification: “Not Authenticated: To reply to non-public forms, you must be in the list of attendees”. Further information is available in the “Forms for Respondents” section.
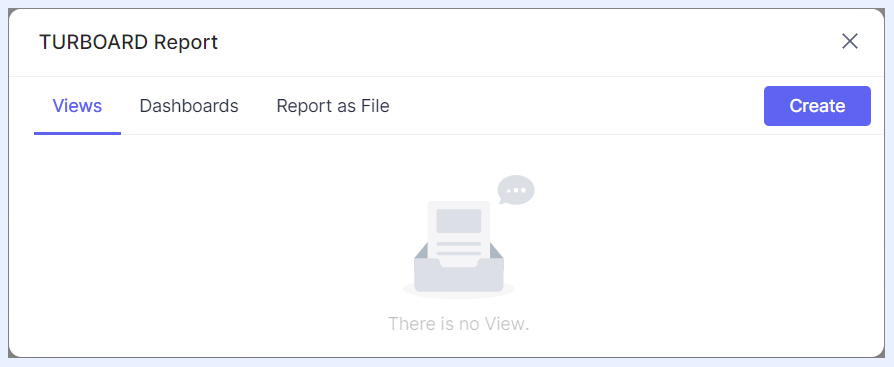
 TURBOARD Report:
The “TURBOARD Report” icon enables the admin user to set up how the collected form answers/data will be collected, reported and analyzed. More on this feature is provided in the “Forms Reports & Data Analysis” section.
 Notify:
The “Notify” icon, when clicked, opens the “Notify” pop-up window. Here, the admin user has the option to send notifications to the form respondents.
This feature is particularly useful for informing respondents about new forms, reminding them of pending submissions, or updating them about changes or important announcements related to the form. It ensures timely communication and promotes active participation from the respondents.
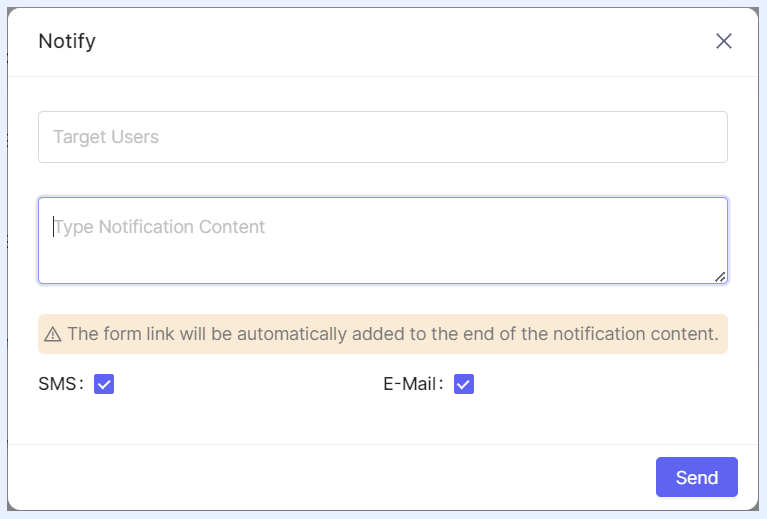
Target Users: This field lists all authorized users (for Restricted forms) in a drop-down as well as an “Everyone” option. The admin can choose to notify all authorized users by selecting “Everyone” option or selectively multi-pick specific authorized respondents for the form.
Note
If the form is set to “Public”, the “Target Users” field will be left blank, indicating that the form will be sent to every user in the system.
Notification Content: A multi-line field dedicated for the admin to write the message that recipients will see in their emails and/or SMS.
Tooltip: A note clarifies: "The form link will be automatically added to the end of the notification content." This ensures recipients have direct access to the form link.
Notification Method: Admins can choose to send notifications via “SMS” or “E-mail” or both by checking the required option/s.
Note
To use the “Notification” feature in TURBOARD Forms, ensure the necessary configurations for SMS and SMTP are set in the system's “Settings” section.